Wonderfarr

Categories
Itineraries

How To Spend 3 Days In Crater Lake National Park? Ultimate Guide

How To Spend 3 Days In Crater Lake National Park?

What is up ladies and germs are you ready to visit a unique landscape with the bluest water you will ever see and do some hiking?!  Well Crater Lake National Park is just the spot for you!  I loved my time here and am excited to share with you how to spend 3 days in Crater Lake National Park.  

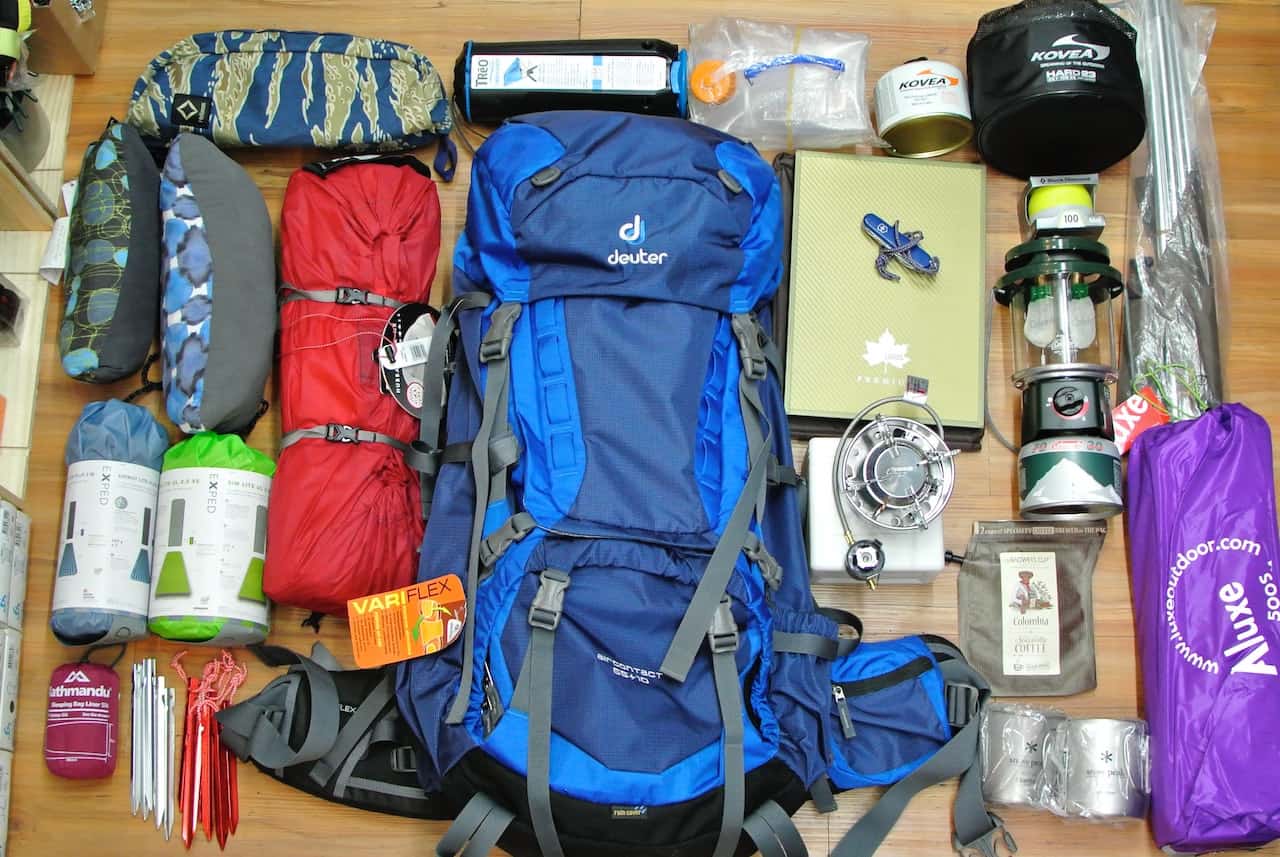
But before we get any further, you should make sure you have the necessary day hiking gear, so you are well prepared for this action-packed vacation!  

How to spend 3 days in crater lake national park

Overview:

Closest Major Airport:  Eugene Airport ~120 miles from the park.

How Many Days To Spend In Crater Lake:  1-3 days

Camping Available In The Park:  Yes.  Two main campgrounds are available within the park, including Mazama Campground and Lost Creek Campground.  Check the Crater Lake National Park website for more details on availability and closures.

3 Day Crater Lake National Park Itinerary:

Crater Lake is an incredible national park, and I think three days is the perfect amount of time to spend here to see what you need.  Let’s jump right into how you should spend your 3 days in Crater Lake National park.

Day 1: Visit The Lodge And Do The Rim Drive

On the first day, I would start by swinging by the ranger station to learn more about the park.  I make it a habit of always speaking with a park ranger when I first arrive at a park to get their insights and important updates such as trail or road closures!   

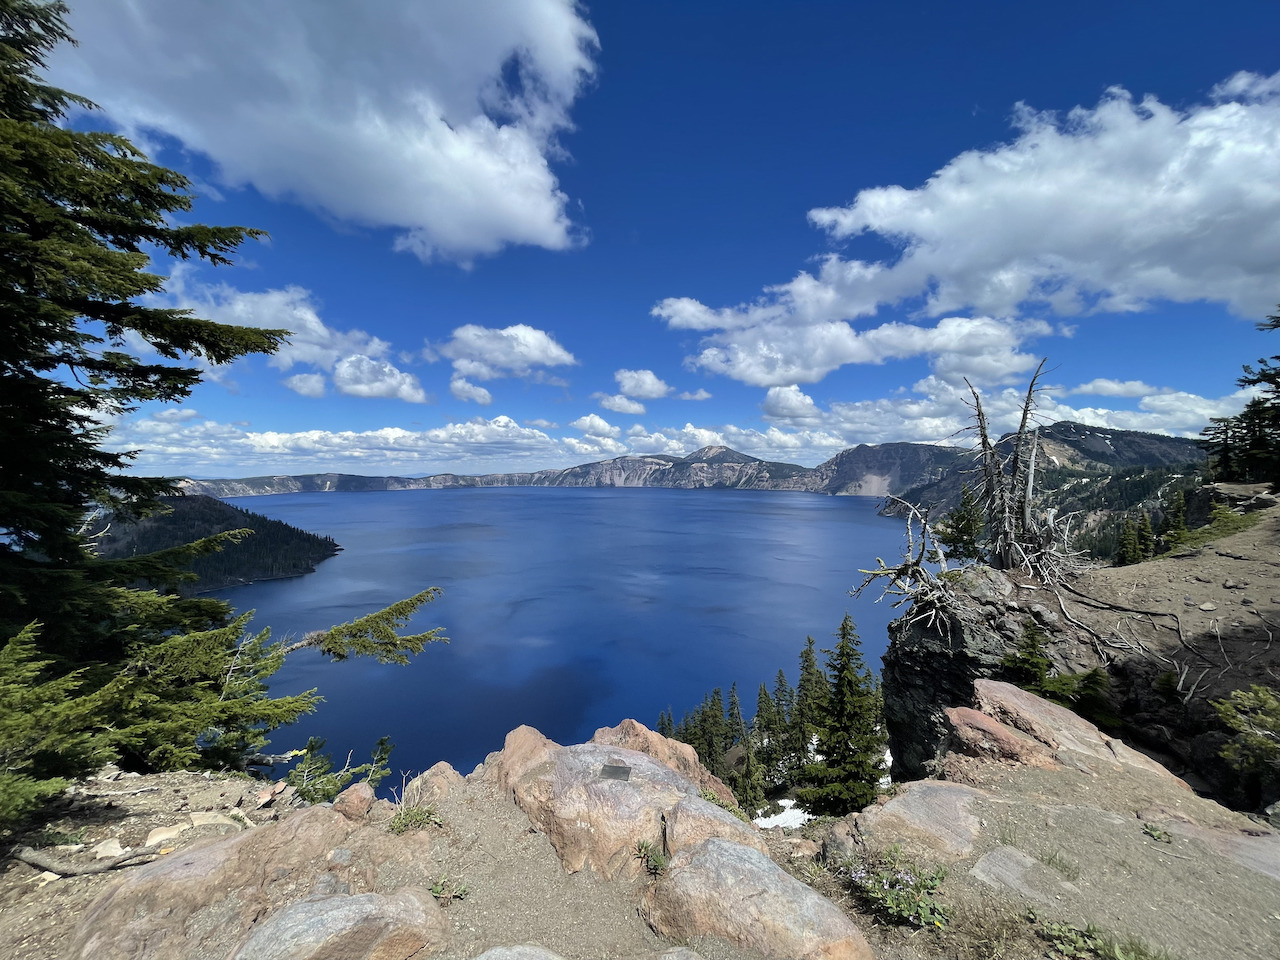
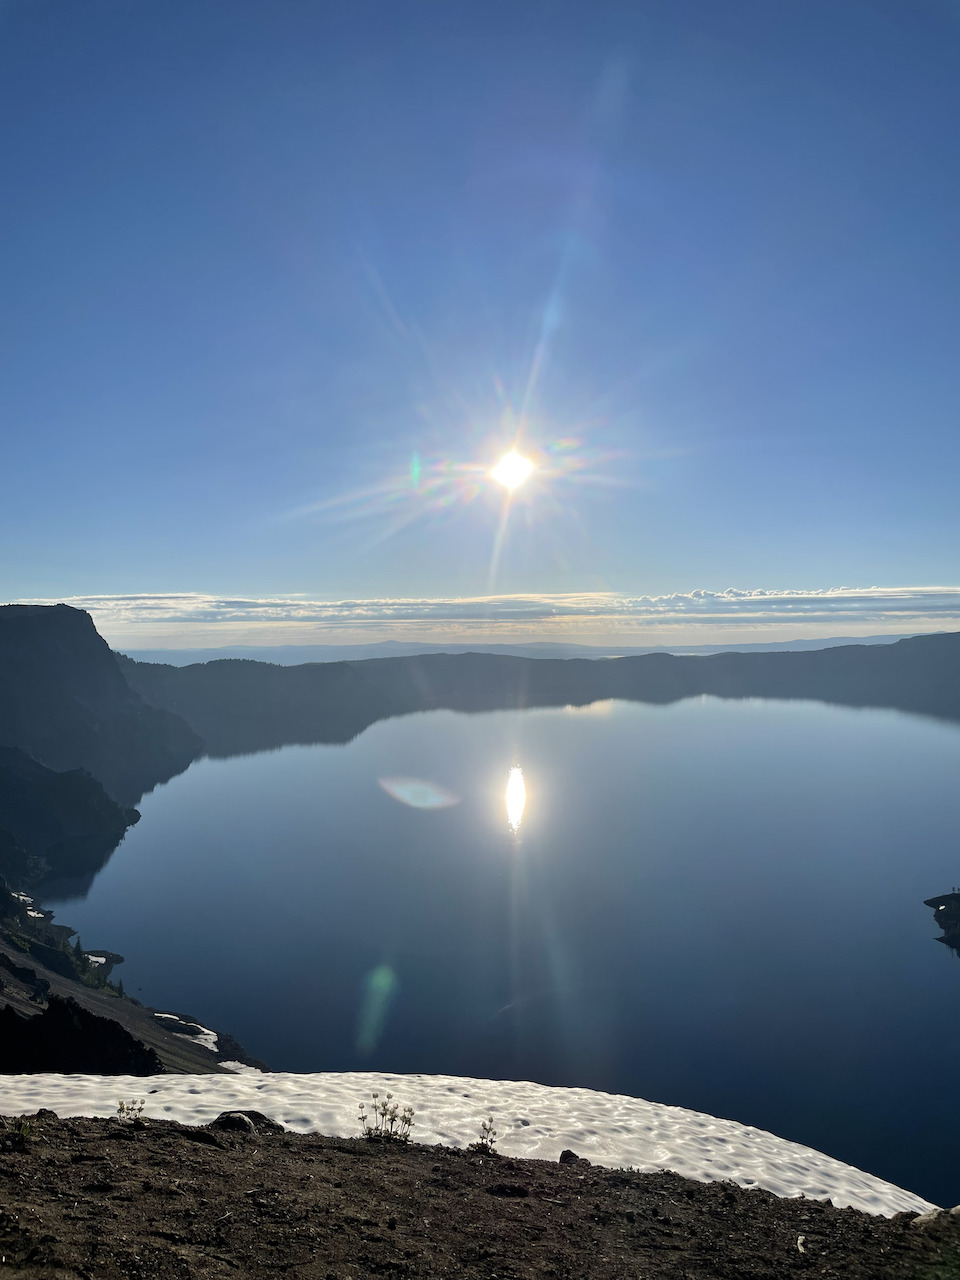
After you get the inside scoop on the park, I highly recommend driving around the rim of Crater Lake.  At about 33 miles, this scenic drive will give you 360 views of this Crater Lake while taking time to stop at some of the spectacular viewpoints on the ride.  The trip can take about two hours, depending on how many stops you make and how long you spend at each outlook, but it is more than worth it. 

Keep in mind that the opening of the entire road may not happen until later in the summer, depending on that season’s snowfall.  So be sure to stay current on road conditions before planning your trip.

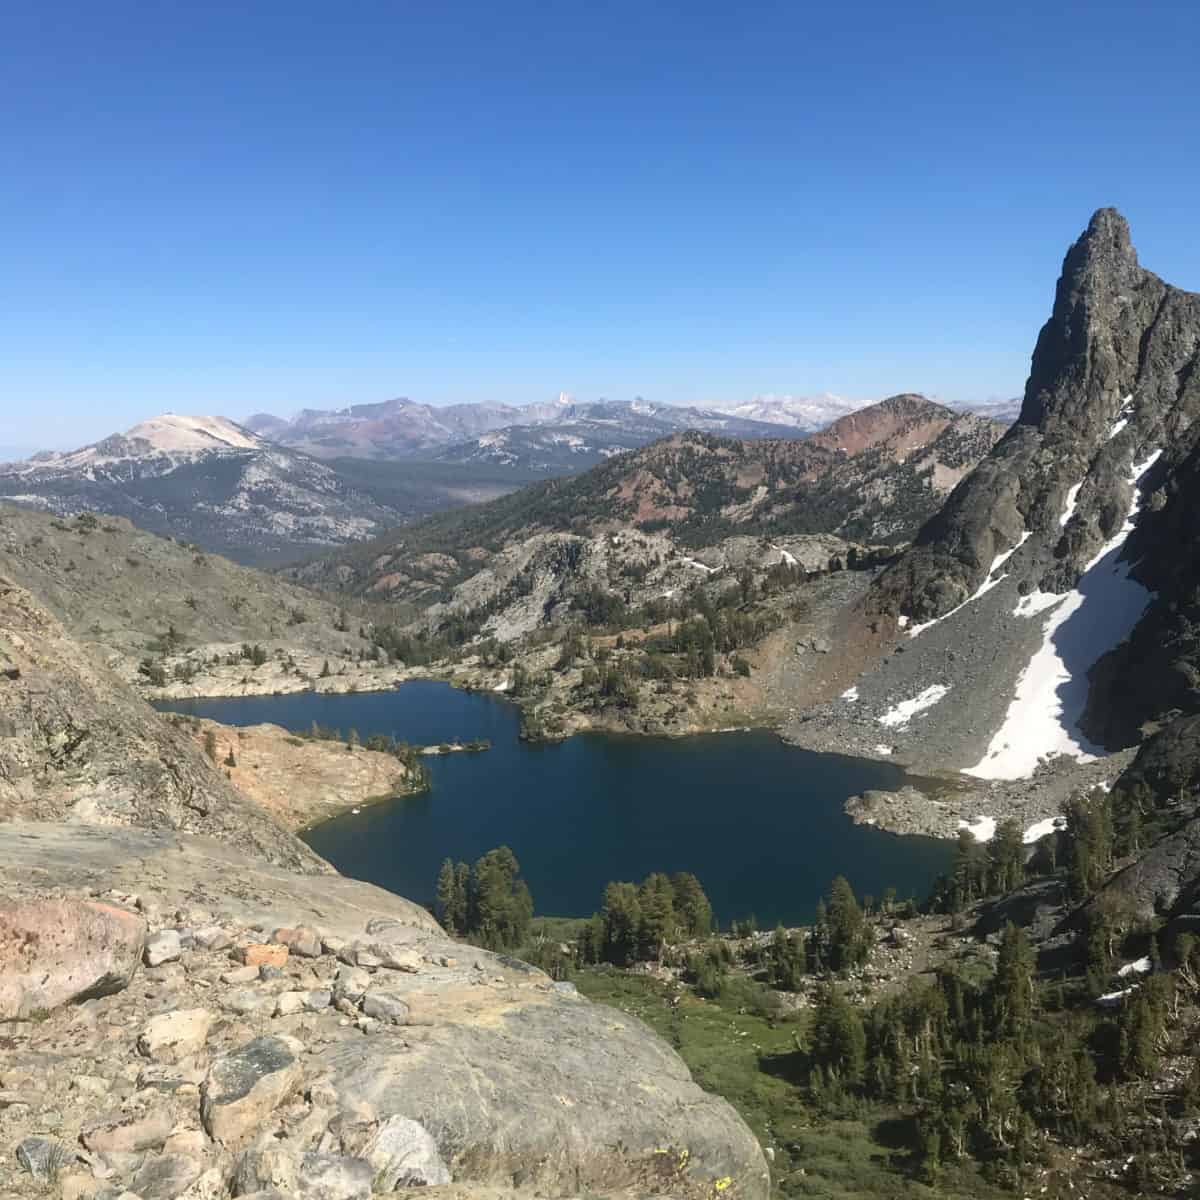
Day 2: Hike Watchman Peak and Cleetwood Cove Trail

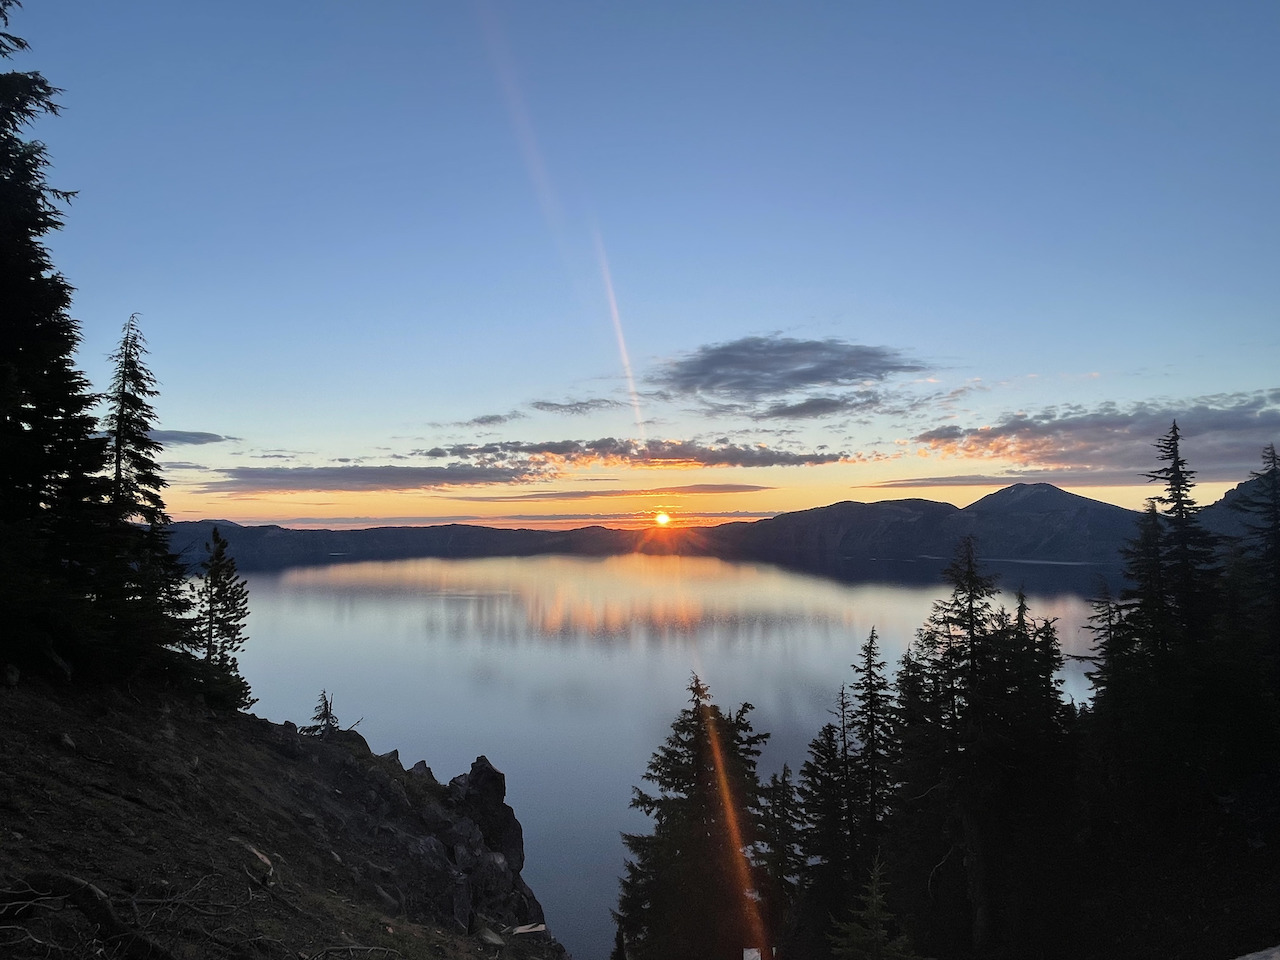
On your second day, I recommend waking up early to catch sunrise and hike up to Watchman Peak.  After your hike up to Watchman Peak spend the remainder of the day hanging out at Cleetwood Cove. 

Hike Watchman Peak

Distance: ~1.6miles roundtrip

Elevation Gain: ~420 ft 

You will start at the Watchman overlook (picture above), and then you have about 1.6 miles round trip with some stunning views of the lake the entire way up!

Hike To Cleetwood Cove:
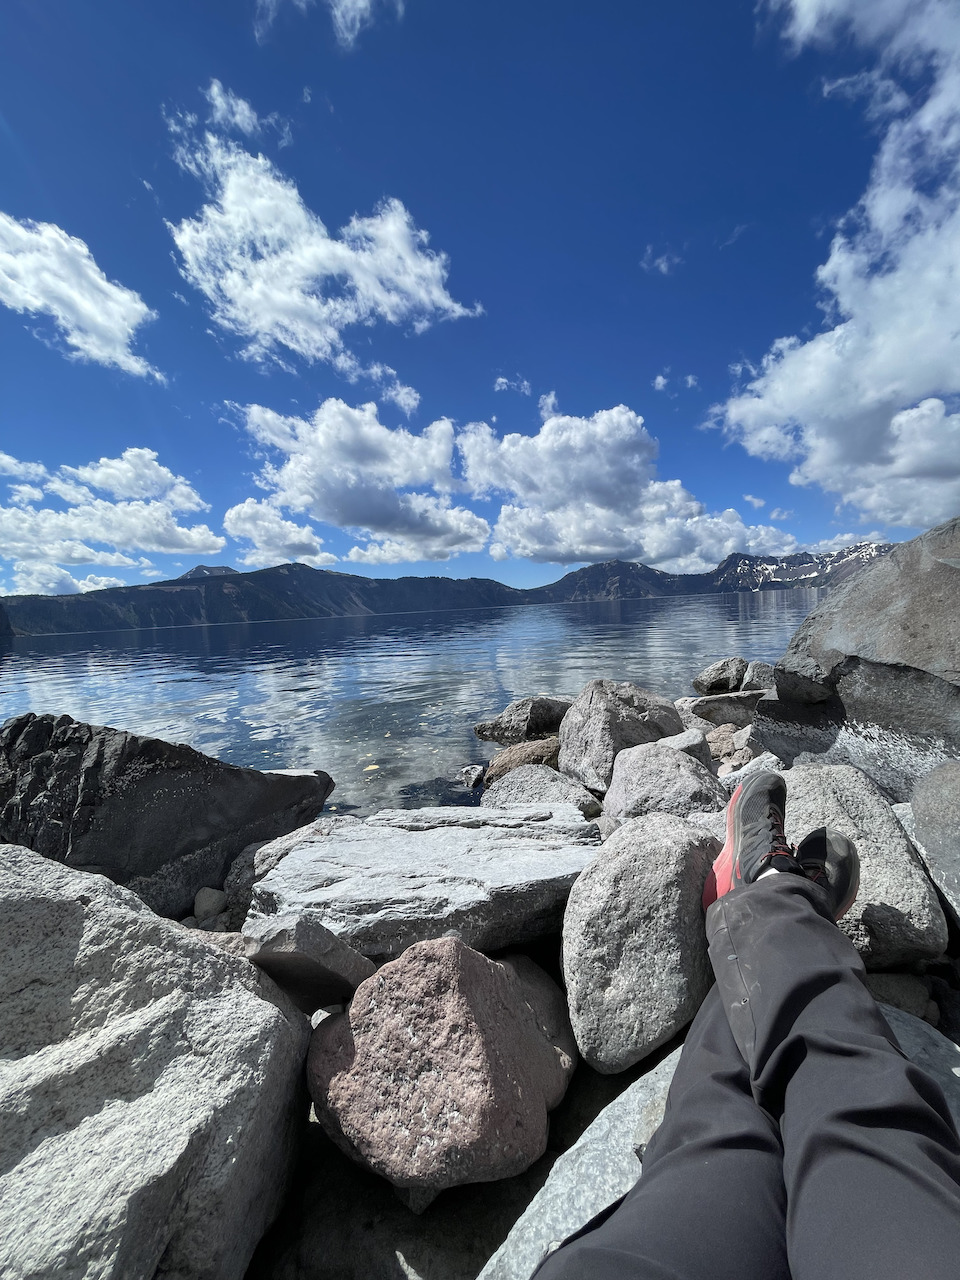
Distance: ~2.2miles

Elevation Gain:  ~700ft

After hiking Watchman peak, you should make your way to Cleetwood Cove.  During this hike, you will descend to water level.  Here you can enjoy your afternoon, have a picnic and take a dip in the famous deep blue water of Crater Lake.  Cleetwood Cove is the only point where the public can access the lake, making it an absolute must-do.

The good news for fishermen is that you can fish in Crater Lake, so don’t forget to bring your pole and tackle!  

Day 3: Hike Plaikni Falls And The Pinnacles:

On your third day, I recommend heading to the Southeast section of the park, where you will take some time away from the incredibly vast Crater Lake and explore this unique area during these two easy hikes.  
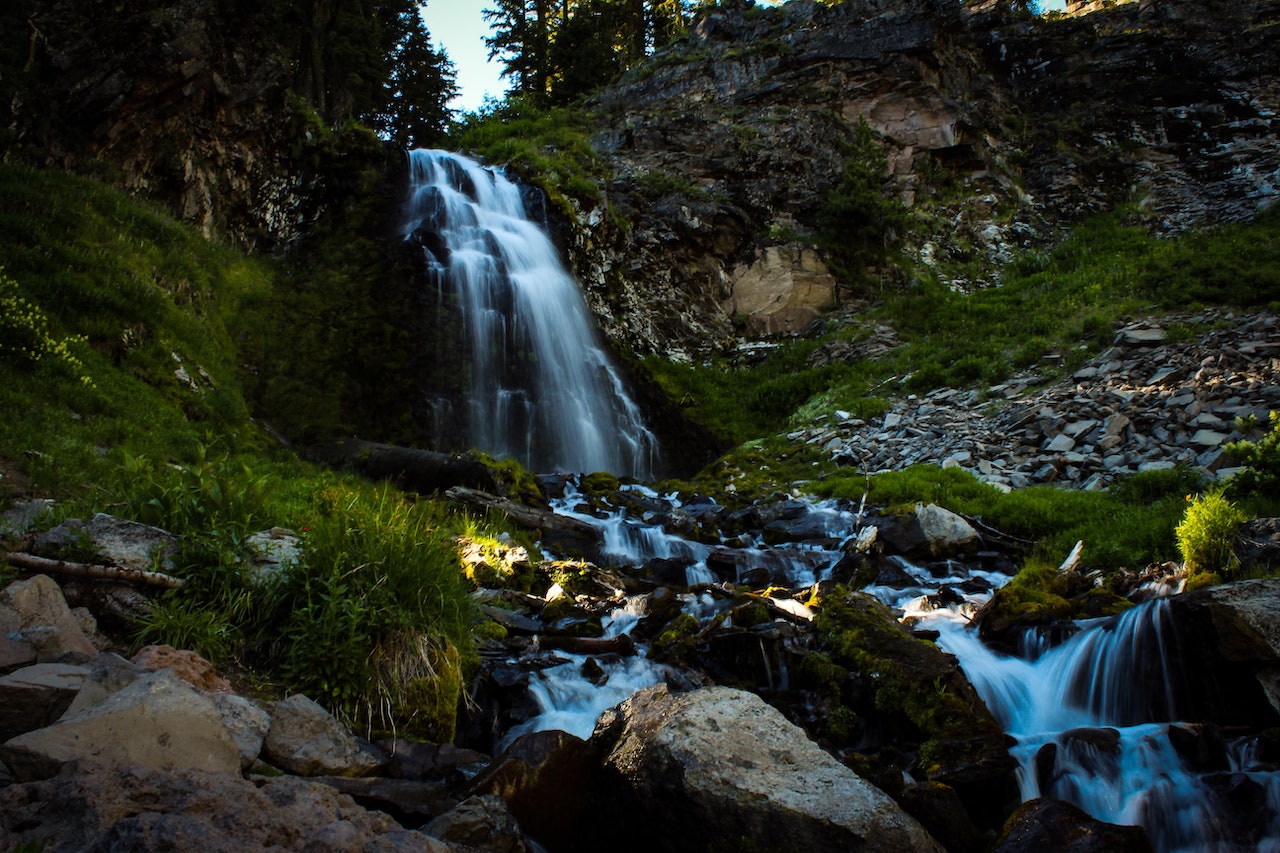
Hike Plaikni Falls

Distance: ~2miles roundtrip 

Elevation Gain:  ~100ft

During this hike you will enjoy a nice walk to some incredible waterfall created from snow melt.  What’s more, this trail is wheelchair accessible making it doable for all!   
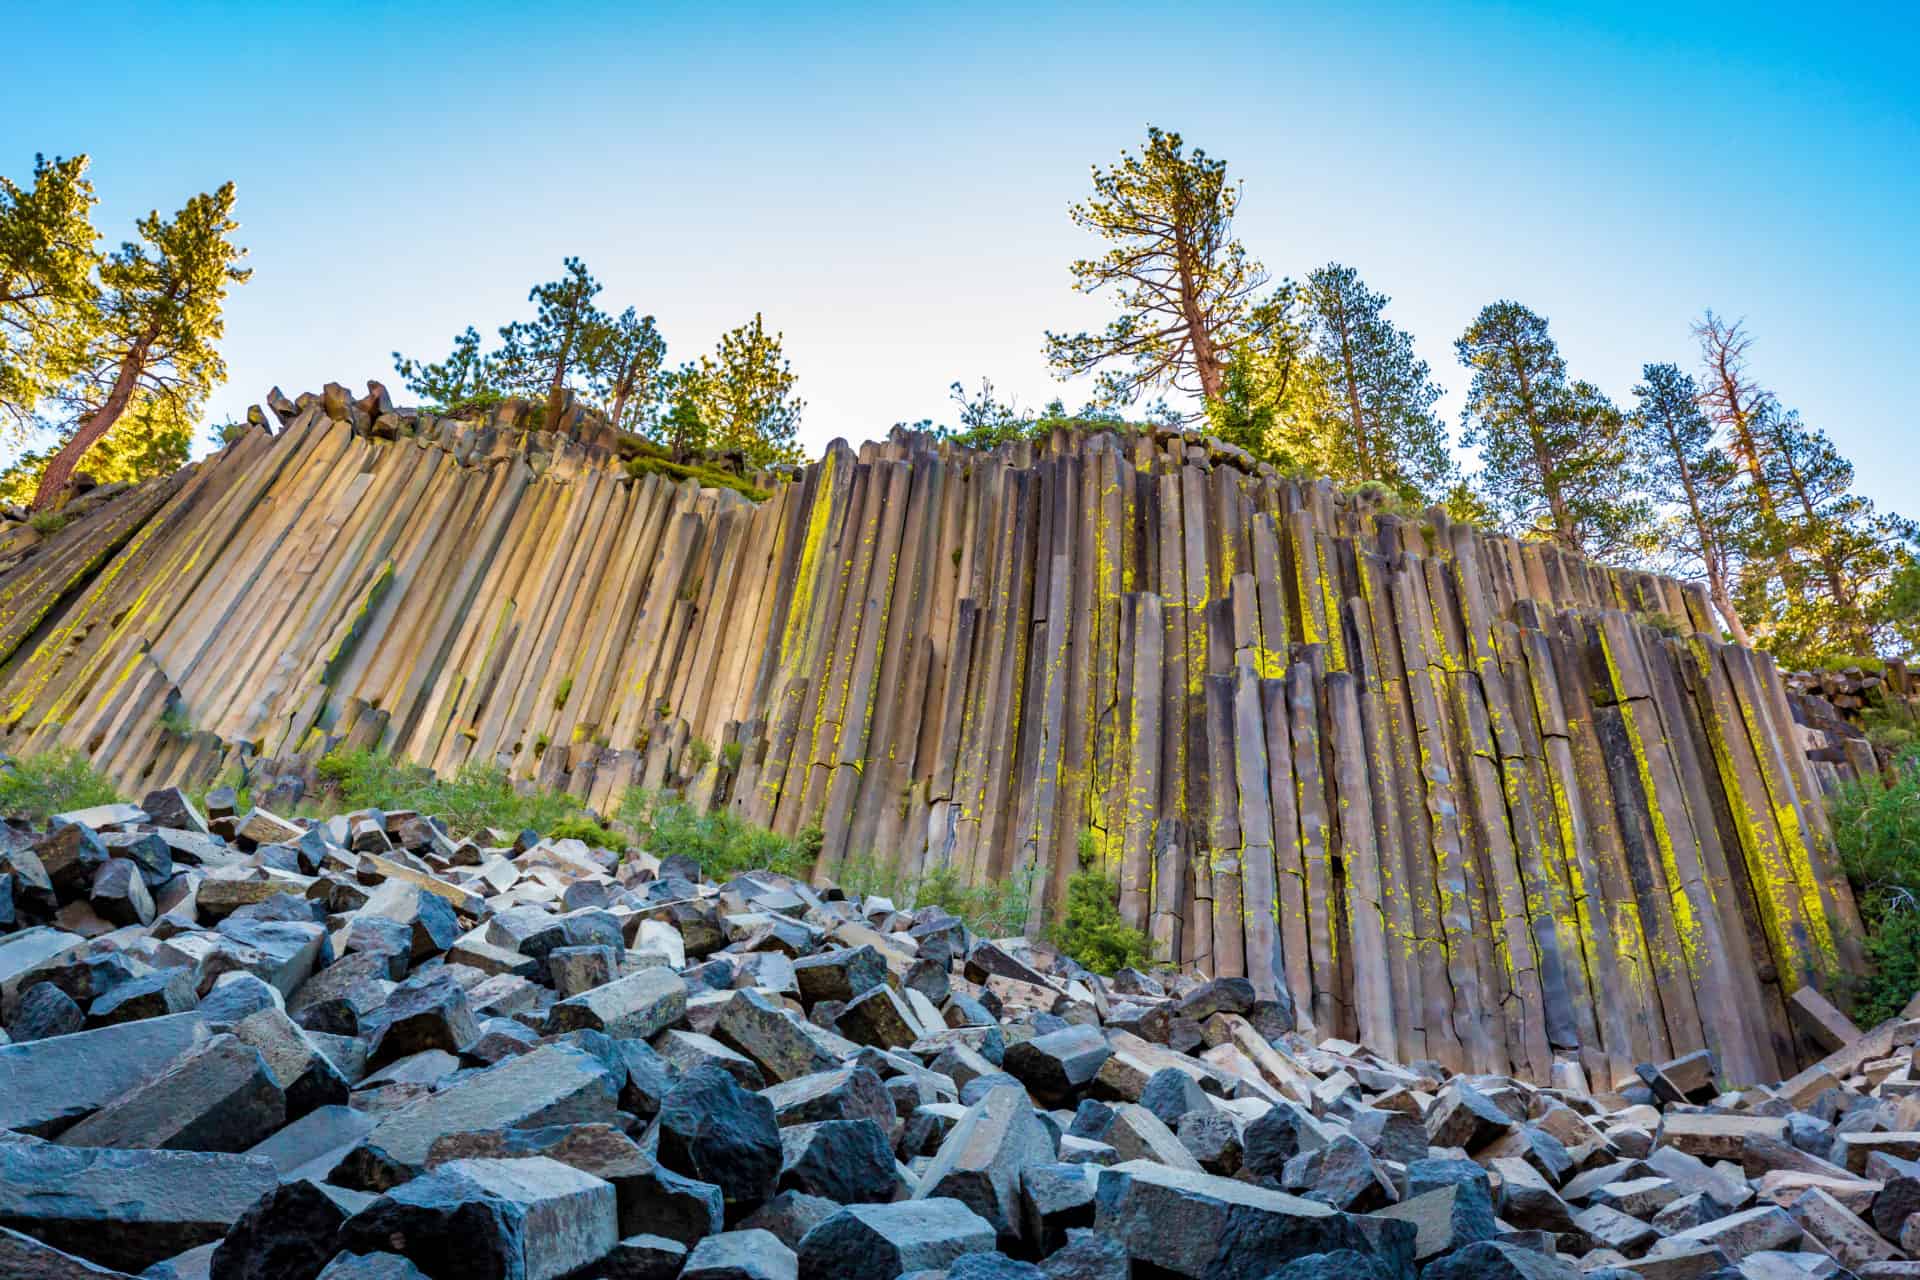
Hike The Pinnacles:

Distance: ~0.8miles roundtrip

Elevation Gain: ~10ft

Just a short drive east of  Plaikni Falls you can hike the Pinnacles, another easy hike that is wheelchair accessible where you can explore a canyon filled with volcanic pumice spires!

Other Cool Things To Do In Crater Lake National Park:

If you have more time on your hands and want other fun things to do, check out some other things to do in Crater Lake National Park Below!

Do Another Hike:

There are a ton of day hikes to do in Crater Lake National Park.  Many of the front-country hikes are very easy, take a look at a list of them and their mileages at the national park website

Cycle Rim Drive:

If driving around the lake sounds boring to you, maybe cycling it would be more your speed.  A popular road cycling destination Crater Lake even closes down the rim for the famous “Ride The Rim” event where participants can bike, walk or run the circumference of Rim Drive.   

Take A Ferry And Explore Wizard Island:

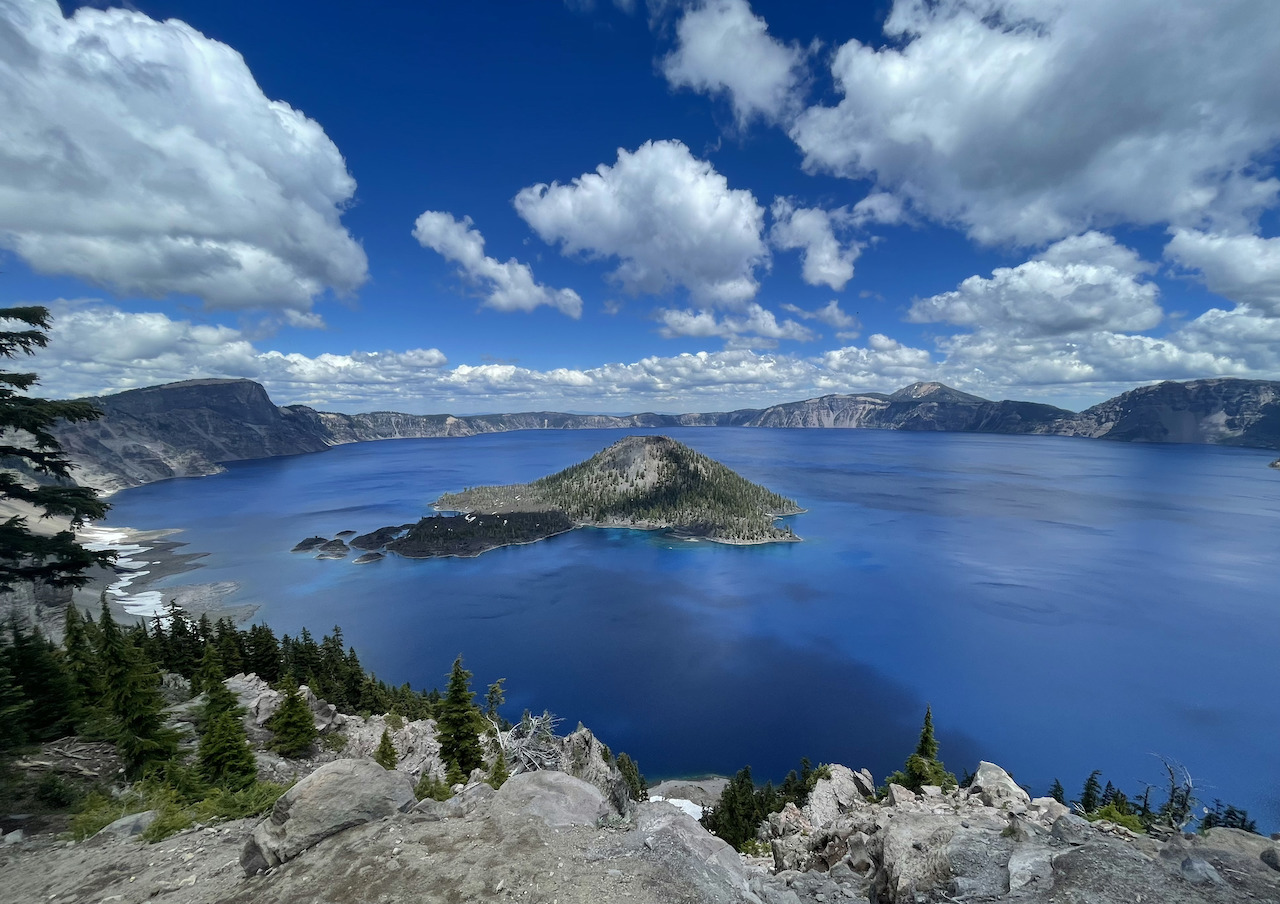
When you visit Crater Lake National Park, you will notice a little island in the middle of America’s largest lake known as Wizard Island.  What’s cool is that you can take a ferry and hike to the top of Wizards Island, where you can witness Crater lake from a unique vantage point and an impressive crater that lies at the summit!  If this sounds fun to you, look into reservations through Crater Lake Hospitality.

Do A Trolley Tour Around Crater Lake:

If hiking isn’t your thing, but you still want to experience Crater Lake, I highly recommend looking into the trolley tours!  These tours allow you to enjoy the fantastic views from a trolley guided by an onboard park ranger, where you will get neat insights about the parks nature, wildlife and history.  Trolly reservations can be made at Crater Lake Trolly.

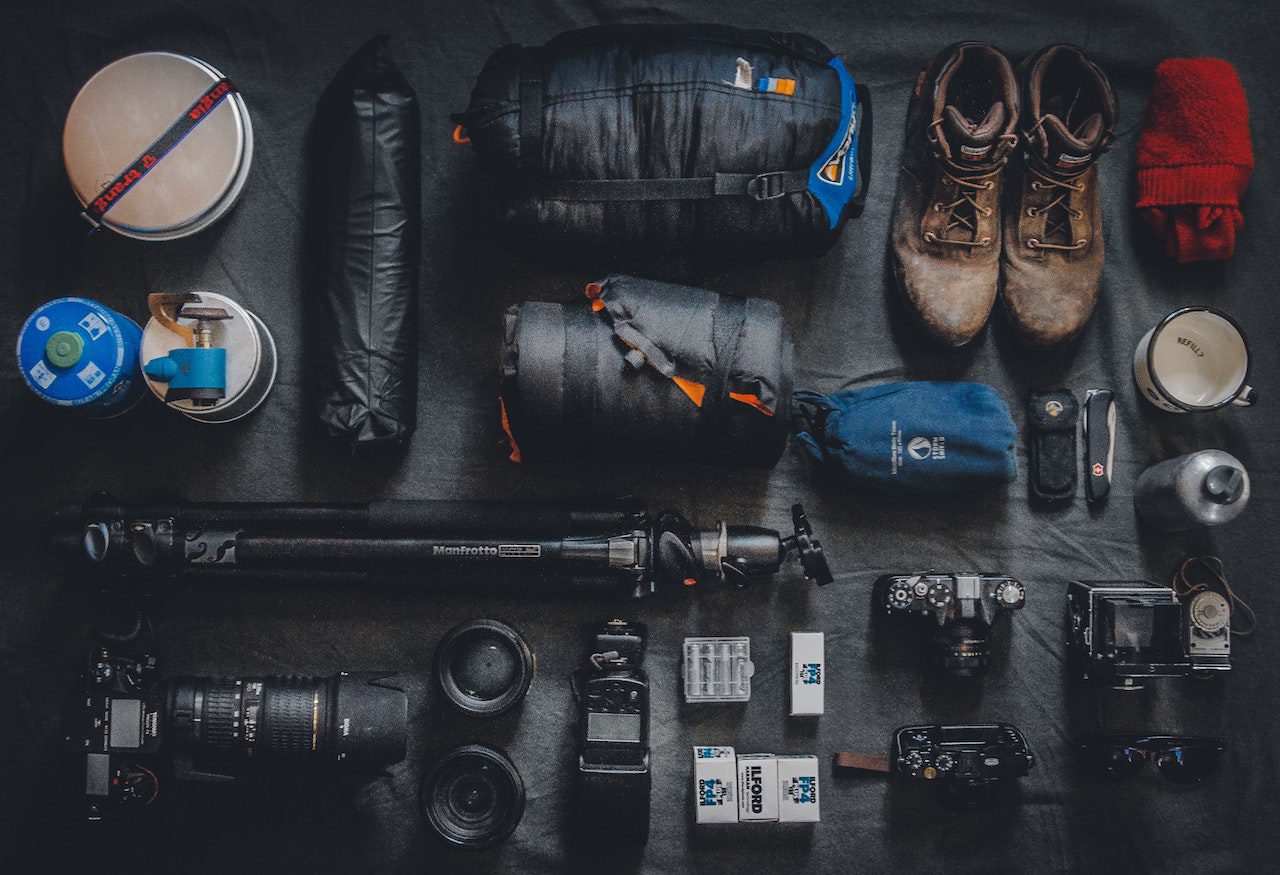
Gear You Should Have When Visiting Crater Lake:

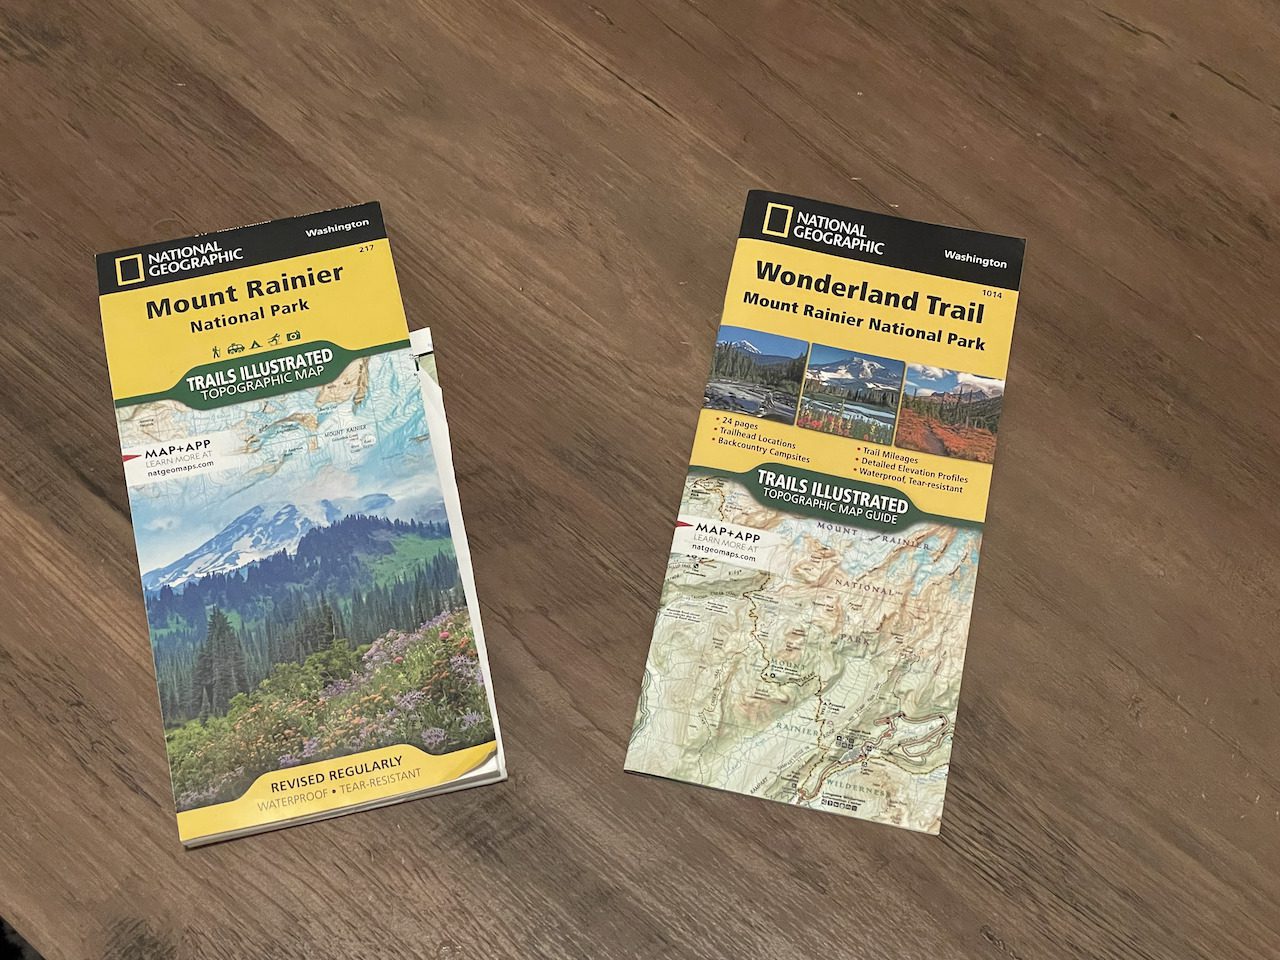
As with any adventure, you must have the proper gear before heading out.  I recommend looking at my “Ultimate Day Hike Gear Guide” so you have all the necessary equipment for hiking in Crater Lake National Park.  Also do not forget to bring a map!

Frequently Asked Questions About Crater Lake National Park:

Entrance fees for Crater Lake include:

  • $30 for private vehicles
  • $25 for motorcycles
  • $15 for cyclists/pedastrians (people walking into the park)
  • FREE with the America The Beautiful Pass!

You may sleep in your car at paid for campsites at Crater Lake National Park.  Otherwise you may not park overnight within the park.  If you wish to boondock or disperse camp near crater lake there are a few options near the south entrance and the north entrance near Diamond Lake check out ioverlander for assistance finding free campsites.  

Crater Lake is 1,943ft deep making it the deepest lake in the United States!

Yes.  You can swim in Crater Lake but the only access-point is through the Cleetwood Cove trail

Yes.  You may fish in Crater Lake either from Cleetwood Cove or Wizard Island.  There are no permits or limits when fishing.

You may bring your pet within 50 feet of any trail, on paved roads, picnic areas and some designated trails.  Pets are NOT permitted to go in Crater Lake.

Crater Lake was formed from a collapsed volcano of Mount Mazma about 7,700 years ago!
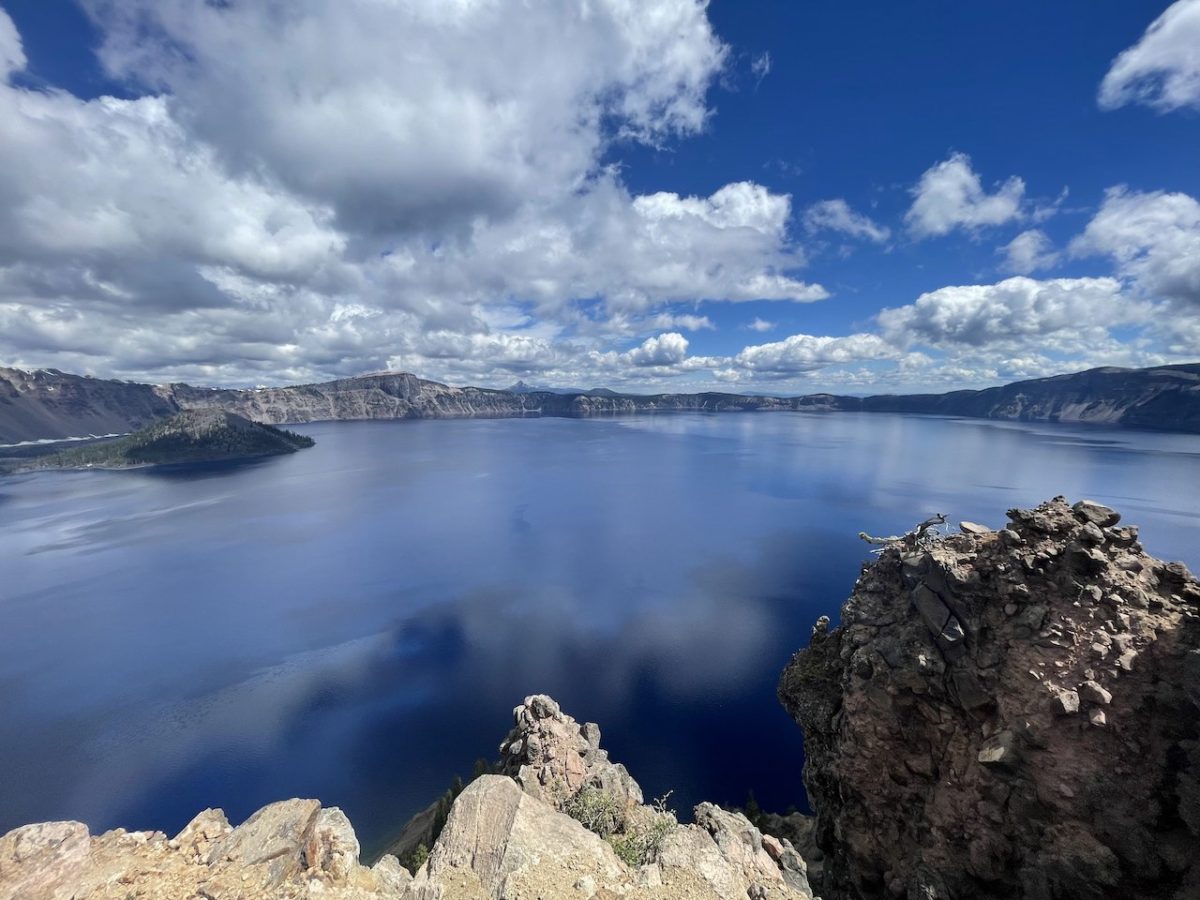
There are no streams or rivers that flow into Crater Lake.  All the water within the lake comes from rainfall or snowfall, resulting in low sediment levels within the lake and making it one of the cleanest lakes in the world!

Yes.  You can often see bald eagles during the summertime at Crater Lake.

Disclosure: Some links on this page are affiliate links, and if you go through them to make a purchase or a booking, I may earn a commission. Using these links DO NOT affect the cost of the product/booking. The price remains the same affiliate link or not.  Thanks for supporting my small business!


Categories
Itineraries Mt Rainier

Best Day Hikes In Mt Rainier National Park

5 Best Day Hikes In Mt Rainier National Park:

Mt Rainier National Park Guide

If you are visiting Mt Rainier National Park for the first time and want to get the most out of your visit, here are some great day hikes that should be on any first-time visitors list!  These hikes are in no particular order, but they all have amazing views.  

  • The Skyline Trail
  • Tolmie Peak
  • Kautz Creek Trail
  • Glacier Basin Trail
  • Hike to Summerland

The Skyline Trail

The Skyline Trail

Distance: ~6.2 miles

Total Elevation Gain: ~1,788ft

Type Of Hike: Loop Trail

Starting Location: Paradise 

The Trail:  Starting from the Paradise area, this amazing loop trail will get you up close in personal to the magnificent Nisqually and Paradise glaciers. When you reach Panorama Point, you will see why this trail is so aptly named!

Tolmie Peak

Tolmie Peak Backpacking Itinerary

Distance: ~5.6 miles

Total Elevation Gain: 1,541ft

Type Of Hike: There and Back 

The Trail: Starting at Mowich Lake this hike offers one of the most breathtaking views in the entire park.  When you reach Tolmies Peak will get not only incredible views of Mt. Rainier but also Mt St Helens and Eunice Lake.  If you want enjoy this view during a backpacking trip you can check out our Tolmie Peak Backpacking Itinerary.

Kautz Creek Trail

Distance: ~11.2 miles 

Total Elevation Gain:   3,969ft

Type Of Trail: There and back

The Hike:  This trailhead starts off of Nisqually Road Southwest of Longmire Visitor Center.  Although this hike is strenous to start, after the difficult climb you will be rewarded with incredible views of the Mirrior Lakes and South Tahoma Glacier of Mt. Rainier.  

Mount Freemont Lookout Trail

Mount Fremont Lookout Trail Day Hikes Mt Rainier National Park

Distance:  ~6.0 miles

Elevation Gain:  1,118ft

Type Of Trail:  Out and Back

The Trail:  Starting out in the Sunrise area this hike begins on the Sourdough Ridge Trail before you hit frozen lake where you will go north on the Mount Fremont Lookout Trail

Hike To Summerland from Fryingpan Creek

hike to summerland day hikes mt rainier

Distance: ~10.1 miles

Elevation Gain: 2,595

Type Of Trail: Out and back

The Trail: Starting at Fryingpan Creek, this nice day hike will get you incredible views of both Emmons and Fryingpan Glacier.  If you hike a view miles farther, you will come across Panhandle Gap, the highest point on the Wonderland Trail!

Categories
Itineraries Mt Rainier

Incredible Tolmie Peak Backpacking Itinerary

3-Day 2-Night Tolmie Peak Backpacking Itinerary:

Tolmie Peak Backpacking Itinerary

This 3-day 2-night Tolmie peak backpacking itinerary is great for a beginner with a log mileage and elevation gain.  Designed as an in and out route you will need either two cars or plan for someone to give you a lift either to the start of the trailhead or when your finish.  You will get amazing views of Mowich Lake, Ipsut Pass, Lake Eunice, and of course Tolmie Peak!

Overview:

Type Of Route:  In and Out

Permits Required:  Yes

Special Gear Considerations: May require ice-ax and crampons depending on trail conditions.  Need bear hang equipment. 

Mileage:  ~19.7 miles

Total Elevation Gain:  ~3,802ft

Day 1: Mowich Lake Entrance to Mowich Lake Campground

  • Via Paul Peak Trail
  • Mileage: ~6 miles
  • Elevation Gain:  2,247ft
Day 2: Mowich Lake Campground to Ipsut Creek Campground (with a climb of Tolmie peak in between)
  • Via Wonderland Trail clockwise>Tolmie Peak Trail>Wonderland Trail Clockwise>Carbon River Trail.
  • Mileage: ~8.85 miles
  • Elevation Gain: 1,549ft

Day 3: Ipsut Creek Campground to Carbon River Trailhead

  • Via Carbon River Trail 
  • Mileage:  ~4.90 miles
  • Elevation Gain:  Minimal to no elevation gain
Tolmie Peak Backpacking Itinerary
awesome views from the top of Tolmie Peak

Check Out More Mt Rainier Backpacking Itineraries!

Backpack The Wonderland Trail

Backpack Through Spray Park

Backpack The Northern Loop Trail

Categories
Mt Rainier Itineraries

Breathtaking Northern Loop Backpacking Itinerary

5-Day 4-Night Northern Loop Backpacking Itinerary:

Northern Loop Trail backpacking itinerary

This Northern Loop Backpacking Itinerary is a loop trail starting and ending at Carbon River Trailhead(you can park on the side of Fairfax Forest Reserve Road).  You will travel along a northern detour of the Wonderland Trail, getting views from Windy Gap, Yellowstone Cliffs, and James Lake.  You will then return to your starting point, taking the Wonderland Trail counterclockwise back to Carbon River, where you will get views of Mystic Lake, Winthrop, and Carbon Glacier

Overview:

Type Of Route:  Loop

Permit Required:  Yes

Special Gear Considerations:  May require ice-ax and crampons depending on trail conditions.  Need bear hang equipment. 

Mileage:  ~42 miles

Total Elevation Gain:  10,040ft

Day 1:  (park car at Fairfax Forest Reserve Road) Carbon River Ranger Station to Yellowstone Cliffs

  • Via Carbon River Trail>Wonderland Trail>Northern Loop Trail
  • Mileage: ~10.2 miles
  • Elevation Gain:  ~3,560ft

Day 2:  Yellowstone Cliffs to Fire Creek Camp

  • Via the Northern Loop Trail
  • Mileage:  ~6.75 miles
  • Elevation Gain: ~2,067ft

Day 3:  Fire Creek Camp to Mystic Lake

  • Via Nothern Loop trail> Wonderland Trail Counterclockwise
  • Mileage:  ~11.70 miles
  • Elevation Gain:  ~3,947ft

Day 4: Mystic Lake To Ipsut Creek Campground

  • Via Wonderland Trail Counterclockwise>Carbon River Trail
  • Mileage:  ~8.0 miles
  • Elevation Gain ~463ft

Day 5: Ipsut Creek Campground to Carbon River Ranger Station

  • Via Carbon River Trail
  • Mileage: ~5.2 miles
  • Elevation Gain:  minimal to none


view of Mt Rainier from Mystic lake
Mt Rainier From Mystic Lake

Check Out Some More Mt Rainier Backpacking Itineraries!

Backpack The Wonderland Trail

Backpack To Tolmie Peak

Backpack To Spray Park

Categories
Itineraries Mt Rainier

Amazing Spray Park Backpacking Itinerary

3-Day 2-Night Spray Park Backpacking Itinerary:​

Spray Park Backpacking Itinerary

Spray Park is a popular detour off the Wonderland Trail loop, giving you up-close views of  Russel and Carbon Glacier.  It is commonly called the  “Mothers Mountain” hike as it loops around Mothers Mountain while traveling on the wonderland and Spray Park Trail. This loop route starts and ends at Mowich lake, offering fantastic views of Mowich Lake, Carbon River, and Ipsut Pass.

Overview: 

Type Of Route:  Loop

Permits Required:  Yes

Special Gear Considerations:   May require ice-ax and crampons depending on trail conditions.  Need bear hang equipment. 

Mileage:  ~17 miles

Total Elevation Gain: 4,720ft

Day 1:  Park car at Mowich Lake Road.  Mowich Lake to Cataract Valley

  • Via Wonderland Trail>Spray Park Trail
  • Distance: ~6.4 miles
  • Elevation: ~1,825ft

Day 2: Cataract Valley to Ipsut Creek

  • Via Spray Park Trail>Wonderland Trail
  • Distance: ~5.2 miles 
  • Elevation Gain: ~131ft

Day 3:  Ipsut Creek to Mowich Lake

  • Via Wonderland Trail
  • Distance ~5.2 miles
  • Elevation Gain: ~2,766ft

Check Out Some More Mt Rainier Backpacking Itineraries!

Backpack The Wonderland Trail

Backpack To Tolmie Peak

Backpack The Northern Loop Trail

Categories
Itineraries Mt Rainier

Backpacking The Wonderland Trail The #1 Complete Guide

Backpacking the Wonderland Trail

What Is The Wonderland Trail?

The Wonderland Trail is a popular backpacking trek in Mt Rainier National Park that encircles the park’s dormant volcano, Mt Rainier.  On this hike, you will get not only beautiful views of Mt Rainier but will also get to hike through lovely meadows, pristine sub-alpine lakes, views of Mt Helens and so much more!  The Wonderland Trail is a very strenuous hike with a lot of mileage and elevation gain/descent.  We will go over everything you need to know about the Wonderland Trail so you can prepare for your own adventure, so without further adieu, let’s get started!

Overview Of The Wonderland Trail:

Mileage:  93 miles (150 kilometers) 

Cumulative Elevation Gain & Loss:  ~ 22,000ft 

Type of Trail:  Loop Trail

Estimated Number Of Days:  About 6-8 Days

Permits Required:  Yes

Wonderland Trail Elevation Profile
Wonderland Trail Elevation Profile Courtesy of the National Park Service

Who Should Hike The Wonderland Trail?

The Wonderland Trail is a strenuous hike and should only be attempted by individuals with backpacking experience and basic outdoor skills.  The trek is lengthy at 93miles with 22,000ft of total elevation gain and descent, and this is not a hike you do coming right off the couch.  If you want some tips on how to improve your hiking endurance, you can take a look at our post. 

When Is The Best Time Of Year To Hike The Wonderland Trail?

Best time to visit Mt Rainier National Park

If you are shooting to hike in the best weather and avoid snow-covered trails, I recommend doing this trail from mid-July to early September.  I made the error on my attempt to hike the trail in mid-June, where much of the park was still covered in snow, requiring us to hike with snow gear and deal with a whole lot of postholing!

How To Plan Your Own Wonderland Trail Backpacking Adventure:

  1. Decide if you want to go clockwise or counterclockwise
  2. Figure out how many days it would take for you to hike the trail confidently.
  3. Pick a starting location.
  4. Plug your information into Wonderland Guides. This is a very helpful website that takes the legwork out of planning a Wonderland Trail Itinerary.
  5. Plan where you want to cache your food along the trail.
  6. Make sure you can secure permits for your intended itinerary. This may require some flexibility on your end if you do not have available permits for your planned itinerary.
  7. Have the right gear.

Hike The Wonderland Trail Clockwise Or Counterclockwise:

The classic direction for the Wonderland Trail is clockwise, typically starting and ending in Longmire Ranger Station.  I do not believe it matters which direction you decide on hiking this trail. I would just try to find out whatever works best for the permit situation you find yourself in, then go with that.

Where To Start Hiking On The Wonderland Trail?

There are three major trailheads with available parking and camping nearby to start your wonderland trail trek.  These are as follows:

  • Longmire
  • Mowich Lake
  • White River

How To Get Permits For The Wonderland Trail:

backcountry permits great smoky mountains

There are three ways to obtain backcountry permits for the wonderland trail.  

  1. Reservation: Mt Rainier National Park allocates two-thirds of their backcountry permits for reservations, during the summer season.  Reservations can be made on recreation.gov starting on April 27th where you can make reservations from June 1st to September 30th.  All reservations must be made 2 days prior to the start of your trip. Permits cost about $26.00 per a trip with a maximum of 13 days.  
  2. Walk-Up Permits:  Mt Rainier National Park allocates the remaining one of third of their backcountry permits to walkups.  Walk-up permits can be obtained no earlier than one day prior to the start of your trip, and can only be issued at one of the park’s wilderness information centers.  There is a non-refundable $6.00 fee for walk-up backcountry permits.
  3. Early-Access Lottery:   Because the Wonderland Trail is such a popular attraction for the park permits are in extremely high demand which prompted the park to start a lottery  This lottery is the BEST way to obtain permits for the Wonderland Trail because it allows you to make reservations before anyone else for the season.  The lottery is typically open during the first couple of weeks in March, be sure to check the NPS website, for the latest lottery information.

***Keep in mind ALL permits must be activated at a ranger station to confirm your information, as well as go over safety, food storage and route information.  Your Permit must be with you at all times when hiking, if you run into a ranger they will ask to see your permit information. 

Can You Hike The Wonderland Trail Without A Permit?

Yes.

While only recommended for veteran ultralight backpackers as you have to hike the trail in three days.  You would have to stay at three front-country campgrounds including Mowich Lake Campground, Cougar Rock Campground, and White River Campground.  Mowich Lake is a free campground all you have to do is register in the parking lot, then for Cougar Rock and White River Campground each cost $20.00 to camp for the night.  The nice thing about these campgrounds is that they are relatively spaced out from each other.

  •   Cougar Rock Campground to Mowich Lake: ~36 miles
  • Mowich Lake to White River Campground: ~26 miles
  • White River Campground to Cougar Rock Campground: ~33 miles

Food Caches On The Wonderland Trail:

With over 93 miles of hiking fortunately the park has several locations where you can cache your food and fuel.  You have the option of either mailing your cache to your desired destination or bringing it yourself to the ranger station.  You want to use a sealable plastic container and properly label your cache with the name of the permit holder, where the cache will be picked up, when the cache will be picked up, and the permit number.

The areas where you can cache food are:

  • Longmire Wilderness Information Center (Fuel must be stored separately from cache)
  • White River Campground
  • Sunrise Old Gas Station
  • Carbon River Ranger Station

Preparing For Wonderland Trail Conditions:

preparing for the wonderland trail

Mountain weather conditions are always rapidly changing and Mount Rainier is certainly no exception.  Be sure to properly research and study the trail conditions prior to setting out on your trip.  A few ways you can do this is by reading through trip reports of people who recently hiked the trail or by reaching out to the ranger station to inquire about the most recent scouting reports of various parts of the park.  I especially encourage the latter as this is often some of the most accurate and up-to-date information regarding the trail conditions. 

Backpacking Gear For The Wonderland Trail:

backpacking gear

You would need the standard backpacking gear as on a typical backpacking trip. Refer to our backpacking checklist to ensure that you have everything you need for your hike.  If there is a chance you will be hiking in the snow, I would highly recommend snow gear, including an ice-ax, crampons, and GPS navigation.  

Get the most up-to-date maps!  Because of the harsh climates in the park, there can be changes to the trail or detours that are necessary depending on environmental factors.  I would recommend purchasing the latest National Geographic topographic map of Mount Rainier National Park.   

On our backpacking gear blog, you can check out some of our highly recommended gear for your Wonderland Trail adventure.

Wonderland Trail Maps
Click Here to Get Your Map On Amazon!

I Hope This Helped!

I hope we answered all of your questions about hiking the Wonderland Trail!  Please feel free to reach out if you have any other questions about the trek.

Categories
Itineraries Mt Rainier

3 Closest Airports Near Mt Rainier National Park

Closest Airports To Mt Rainier National Park

If you are not fortunate enough to live in the pacific northwest odds are you are flying to Mt Rainier!  Below are the three closest airports to Mt Rainier National Park 

  • Seattle-Tacoma International Airport
  • Portland International Airport
  • Vancouver International Airport

Seattle-Tacoma International Airport (SEA):

At about 51 miles away,  Seattle-Tacoma International Airport is the closest airport to Mt Rainier National Park.  A hub for Alaska and Delta Airlines, SeaTac also hosts 34 other airline companies, which gives many flight options and variety when planning your trip. 

Distance From Mt Rainier: 51 miles (from Carbon River Ranger Station)

Estimated Driving Time: about 1hour and 10 minutes to Carbon River Ranger Station

Address:  17801 International Blvd, Seattle, WA 98158

Phone Number:  (206) 787-5388

Website:  Click Here

Portland International Airport (PDX):

If you are having difficulty getting flights  intended schedule at SEA-TAC then Portland International Airport is your next closest option.  

Distance From Mt Rainier: 144 miles (to Longmire Wilderness Information Center)

Estimated Driving Time: 2hours and 30minutes to Longmire Wilderness Information Center

Address: 7000 NE Airport Way, Portland, OR 97218

Phone Number: (503) 460-4234

Website:  Click Here

Vancouver International Airport:

This would be a last resort option if you are unable to get a flight from the other two airports, reason being this is the farthest from the park no matter how you slice it. 

Distance From Mt Rainier: 195 miles (to Carbon River Ranger Station)

Estimated Driving Time: 4hours and 40minutes to Carbon River Ranger Station

Address: 3211 Grant McConachie Way, Richmond, BC V7B 0A4, Canada

Phone Number: +1 604-207-7077

Website:  Click Here

Categories
Itineraries Ansel Adams Wilderness

Amazing Backpacking Itineraries Featuring Minaret Lake

3-Day 2-Night Backpacking Itinerary to Minaret Lake:

minaret lake backpacking itinerary

One of the famous alpine lakes in the Sierra Mountains, Minaret Lake is a must-see on your visit to Ansel Adams Wilderness.  The iconic jagged peaks surrounding the lake resemble a Minaret hence the name.  Upon arriving and camping out at this lake, you feel as though you are in an amphitheater created by the mountains.  

Trek Specs:

Type Of Route:  Loop

Total Distance:  ~24.4 miles

Total Elevation Gain:  ~7,093ft

Backpacking Permits Required:  Yes

Day 1: Car at Agnew Meadows Road to Ediza Lake (Shadow Creek).

  • Distance: ~6.4 miles
  • Elevation Gain: ~1,388ft
  • Via Pacific Crest Trail>Shadow Creek Trail(overlap with John Muir Trail)>Ediza Lake trail

Day 2: Ediza Lake (Shadow Creek) to Deadhorse Lake (Minaret Lake)

  • Distance: ~7.1 miles
  • Elevation Gain: ~4,665ft
  • Via  Route up Ritter> hike down>Ediza Lake Spur Trail>Shadow Creek trail>Cecile Lake Trail>Minaret Creek Trail
  • Here you can take a detour to the hike to Mount Ritter where we got some cool views of Thousand Island and Garnet Lakes.

Day 3: Deadhorse Lake (minaret Lake) to Agnew Meadows.

  • Distance: ~11.9 miles
  • Elevation Gain: ~1,040ft
  • Via Minaret Creek Trail>John Muir Trail>Pacific Crest Trail
Categories
Ansel Adams Wilderness Itineraries

Backpack to Devils Postpile

Backpacking Itinerary Featuring Devils Postpile:

devils postpile backpacking itinerary

A geologic wonder of the world and a national monument Devils Postpile is a must see on everyone’s Ansel Adams Wilderness adventure!  These beautifully symmetric columns of basalt formed over 100,000 years ago are truly a unique feature to witness.  

4-day 3-night In and Out Route:

This 4-Day 3-Night in and out route starts just outside Mammouth Mountain ending at silver lake campground.  Not only will this does this route feature Devils Postpile but you will also get some amazing views of many alpine lakes including Minaret, Ediza, Clarks, Garnet, and Agnew Lakes.  

Trek Specs:

Type Of Route:  In and Out

Total Mileage:  ~32 miles

Total Elevation Gain:  ~6,179ft

Permits Required:  Yes

Day 1: Horshoe Lake Parking to Minaret Falls Campground.

  • Distance: ~9 miles
  • Elevation Gain: ~804ft
  • Via Lakes Basin Path>Mammoth Pass Cutoff Trail>Red Cones Cutoff Trail>Upper Crater Meadows Trail>John Muir/Pacific Crest Trail(runs contiguous for this section)>Kings Creek Trail>Minaret Road

Day 2: Minaret Falls Campground to Minaret Lake.

  • Distance: ~7.8 miles
  • Elevation Gain: 2,379ft
  • Via Minaret Road>John Muir Trail>Minaret Creek Trail

Day 3:  

  • Distance: ~8.2 miles
  • Elevation Gain: ~1,762ft
  • Via Minaret Creek Trail>Cecile Lake Trail>Shadow Creek Trail>Ediza Lake Spur Trail>Shadow Creek Trail>John Muir Trail going Northwest>Garnet Lake Cutoff Trail

Day 4: 

  • Distance: ~7 miles
  • Elevation Gain: ~1,234ft
  • Via River Trail going east>Clark Lakes Trail>Spooky to Clarks Cutoff Trail>Spooky Meadow Trail>Rush Creek Trail

Views From This Trek!

Devils Postpile
Minaret Lake
Thousand Island Lake
Previous slide
Next slide
Categories
Itineraries Ansel Adams Wilderness

4-Day 3-Night Backpacking Itinerary To Thousand Island and Garnet Lakes:

4-Day 3-Night Backpacking Itinerary To Thousand Island and Garnet Lakes:

thousand island lake day hike

Thousand Island and Garnet Lakes are two of the many breathtaking alpine lakes in the Ansel Adam Wilderness. The Itinerary below will not only bring you to these lakes but will also get you some amazing views from the Pacific Crest Trail and the John Muir Trail.  

Trek Specs:

Type of Route: Loop

Total Mileage:  ~32 miles

Total Elevation Gain:  ~7,002

Permits Required:  Yes

Trek Overview:

This 4-Day 3-Night Loop route starts and ends at Park Bench Trailhead making things a bit more logistically easier as you can just return to your car at the end of your trip.  Although this trip features Thousand Island and Garnet Lakes you will also get some nice views of several other gorgeous alpine lakes including Gem, Shadow, Olaine,  and Clark Lakes.

Day 1: Park Bench Trailhead to Thousand Island Lake.

  • Distance: ~9.2 miles
  • Elevation Gain: ~3,314ft
  • Via Park Bench Trail>Rush Creek Trail>Spooky Meadow Trail>Pacific Crest Trail

Day 2: Thousand Island Lake to Agnew Meadows Campground.

  • Distance: ~10miles
  • Elevation Gain: 1,188ft
  • Via John Muir Trail>Shadow Creek Trail>Pacifi Crest Trail

Day 3:  Agnew Meadows Campground to Badger Lake Campground.

  • Distance: ~6.8
  • Elevation Gain: ~1,837
  • Via Pacific Crest Trail North

Day 4: Badger Lake to Park Bench Trailhead

  • Distance: ~5.9 miles
  • Elevation Gain ~663ft
  • Via Pacific Crest Trail>Clark Lakes Trail>Spooky to Clark Cutoff Trail>Spooky Meadow Trail>Rush Creek Trail>Park Bench Trailhead

Views On The Trail!

Olaine Lake
Shadow Lake
Thousand Island Lake
Garnet Lake
Previous slide
Next slide

Get Your Backpacking Checklist!!!

Get your free backpacking checklist!

Join our mailing list to get the latest news, updates, posts, trails, and itineraries!