Arches National Park Hiking Guide:
Welcome to the Arches National Park Hiking Guide! If petrified sand dunes, massive red rock towers and over 2,000 natural arches sounds like fun then Arches National Park is for you!
Park Overview
- Location: Grand County, Utah
- Closest Airports:
- Moab Airport ~15min drive
- Grand Junction regional airport ~1hr and 30min drive
- Salt lake city International Airport ~3hrs and 50min drive
- Entry Reservation: Required.
- Busy Season: March – October
- Entrance Fee:
- Car: $30.00
- Free For America the beautiful pass holders.
How Much Time Do I Need To Spend In Arches National Park?
1-3 Days
This depends on what you are trying to do in the park. If you are just trying to catch the highlights you can probably get it done in a day.
However if you want to take a deeper dive and hit all the trails you can probably get it done in 2-3 days depending on your fitness. I was able to hit all of the major hiking trails and viewpoints in just two days but there were times I felt as though I was rushing through the park and wish I took my time and extended my stay an extra day.
Does Arches National Park Require A Reservation For Entry?
Yes.
Arches National park began requiring entry reservations for admission into the park as of 2022. A reservation is required if visiting the park between April 3rd to October 3rd, 2022 during the times between 6:00 AM and 5 PM. You can make a reservation at recreation.gov for a two-dollar reservation fee.
Can I Still Enter Arches National Park Without A Reservation?

Yes.
If all of the reservation slots for a particular date are booked, not to worry. There are still ways you can get into the park for your desired date! The two ways you can get around needing a reservation for entry into the park are:
- Check for last-minute reservations: The park releases last-minute reservation slots on recreation.gov at 6 pm the day before!
- Get there early or late: Reservations are not required to enter the park before 6 am or after 5 pm. I came to the park at 5 am each day. Although waking up early sucked, catching incredible sunrises on empty trails was terrific!
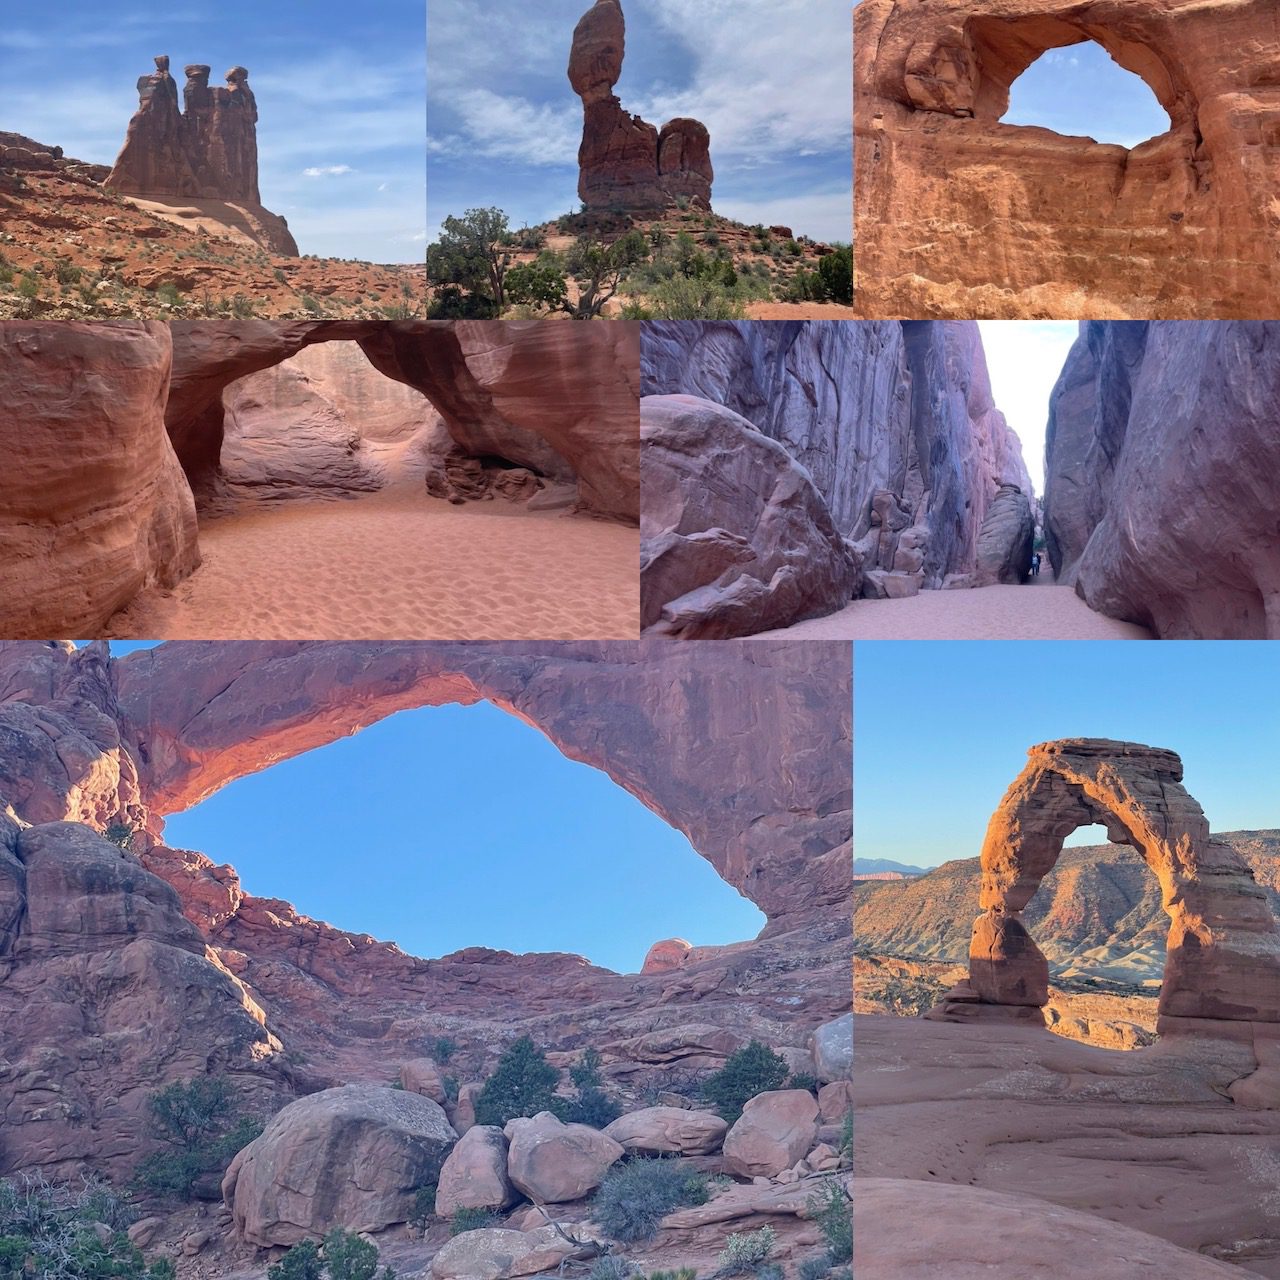
Areas of Arches National Park:
There are seven major areas of Arches National Park knowing the areas and what hikes are located at each will help you plan your trip. The below are the different areas listed in proximity to the park entrance:
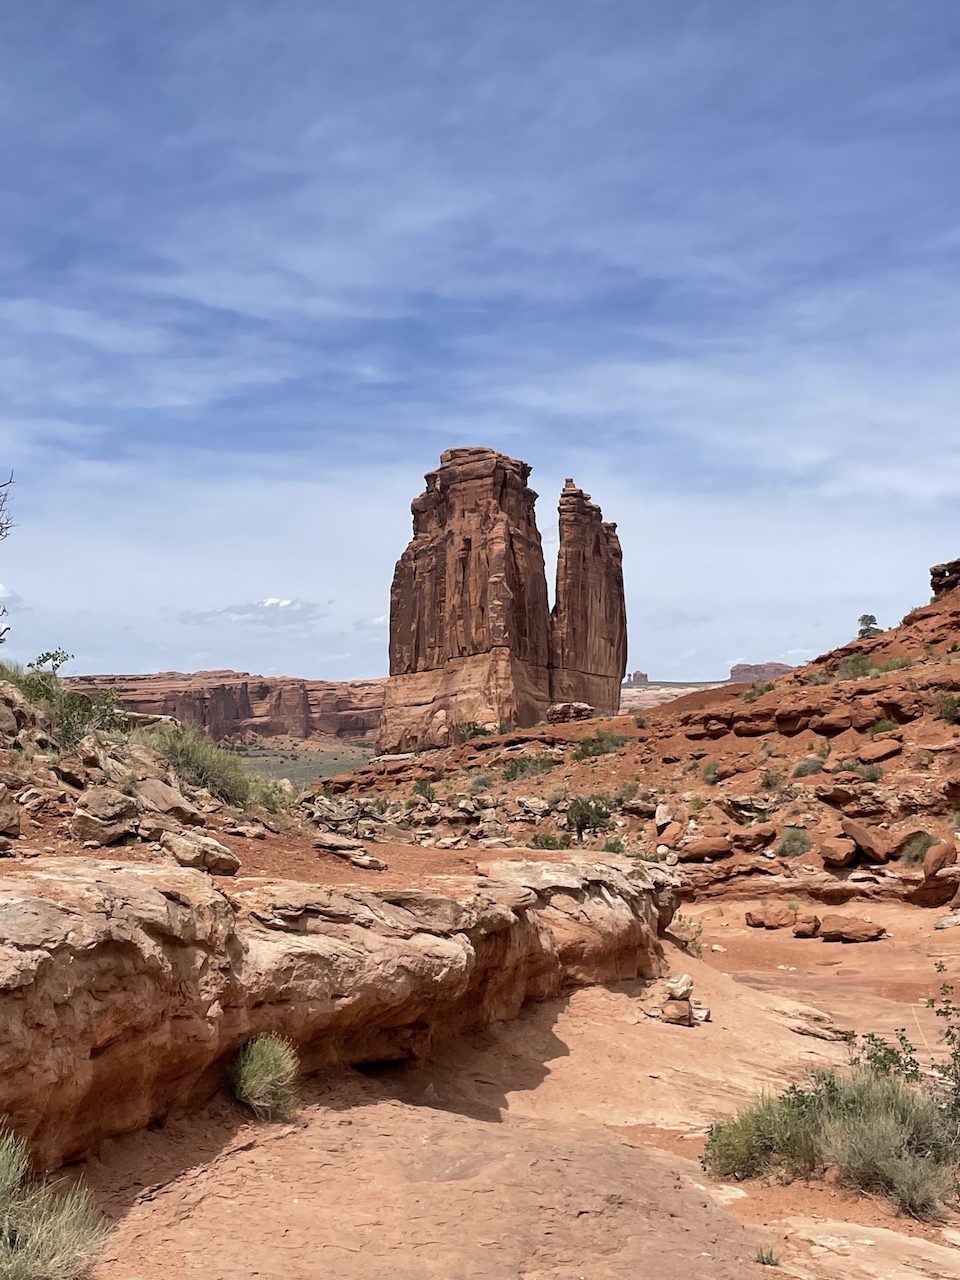
- Park Avenue
- Park Avenue Trail
- The Windows Section
- Balanced Rock Trail (just prior to windows section)
- North & South Windows
- Turret Arch
- Double Arch
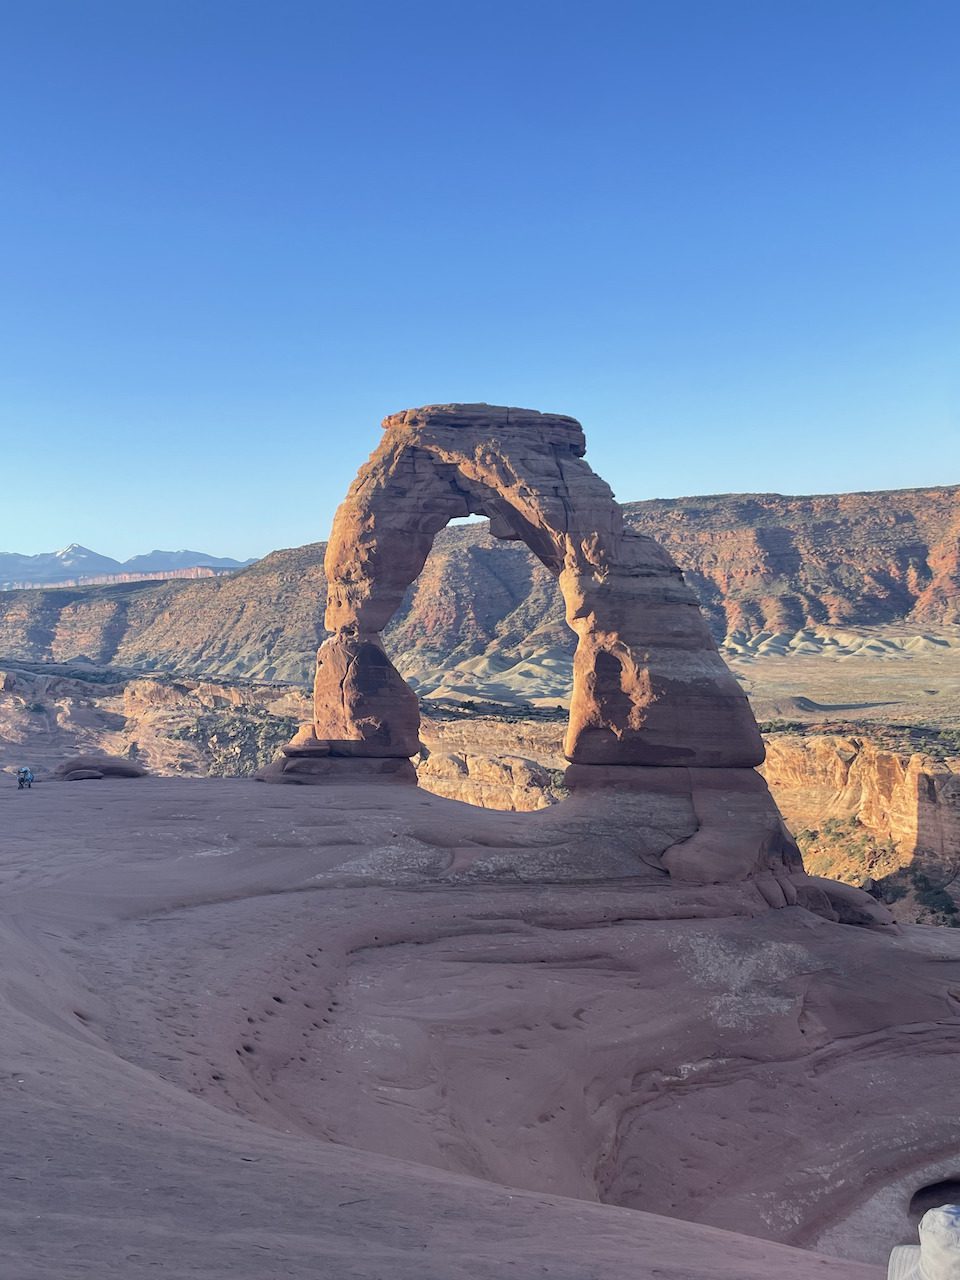
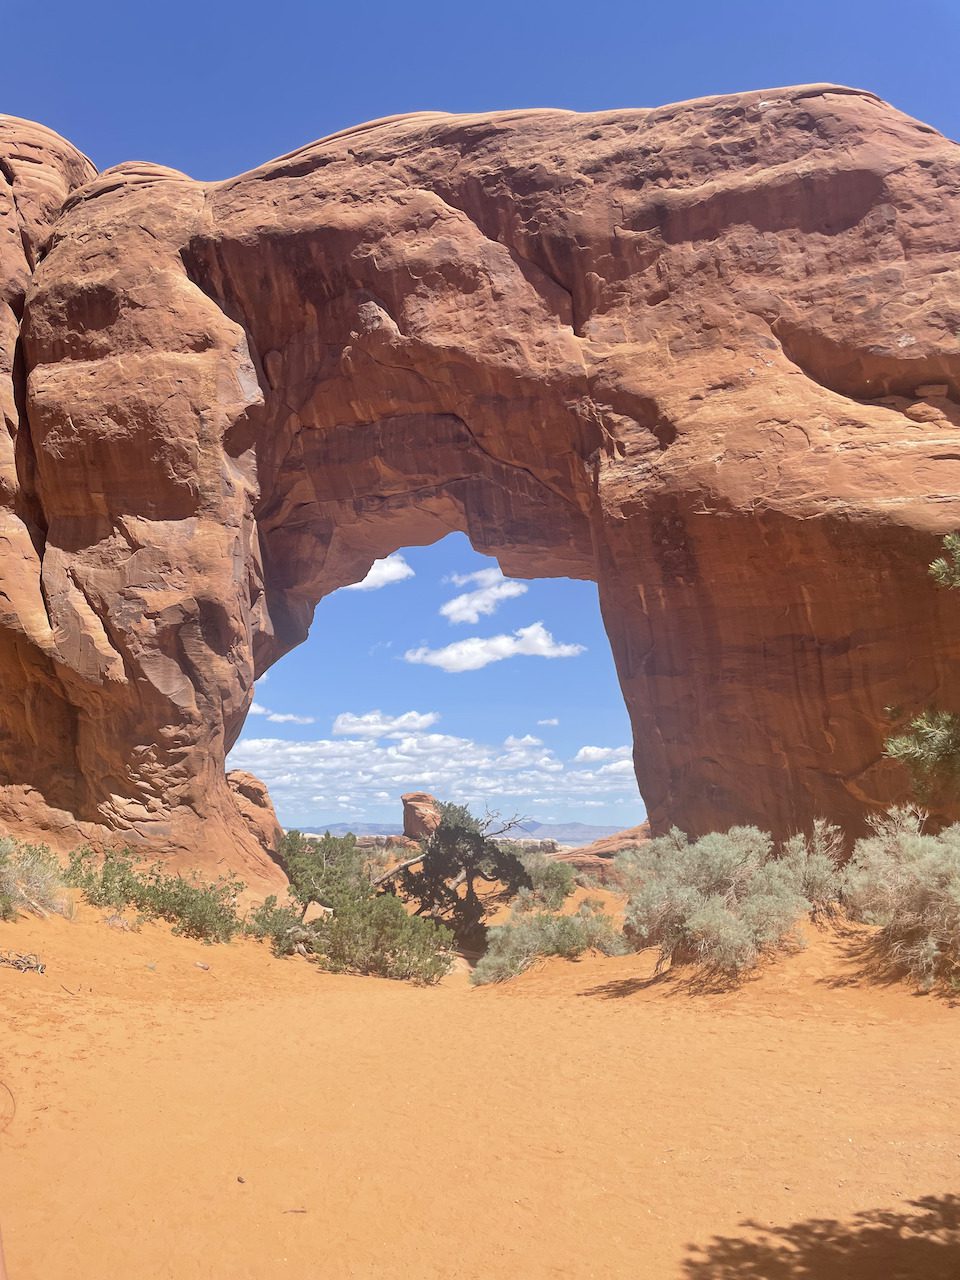
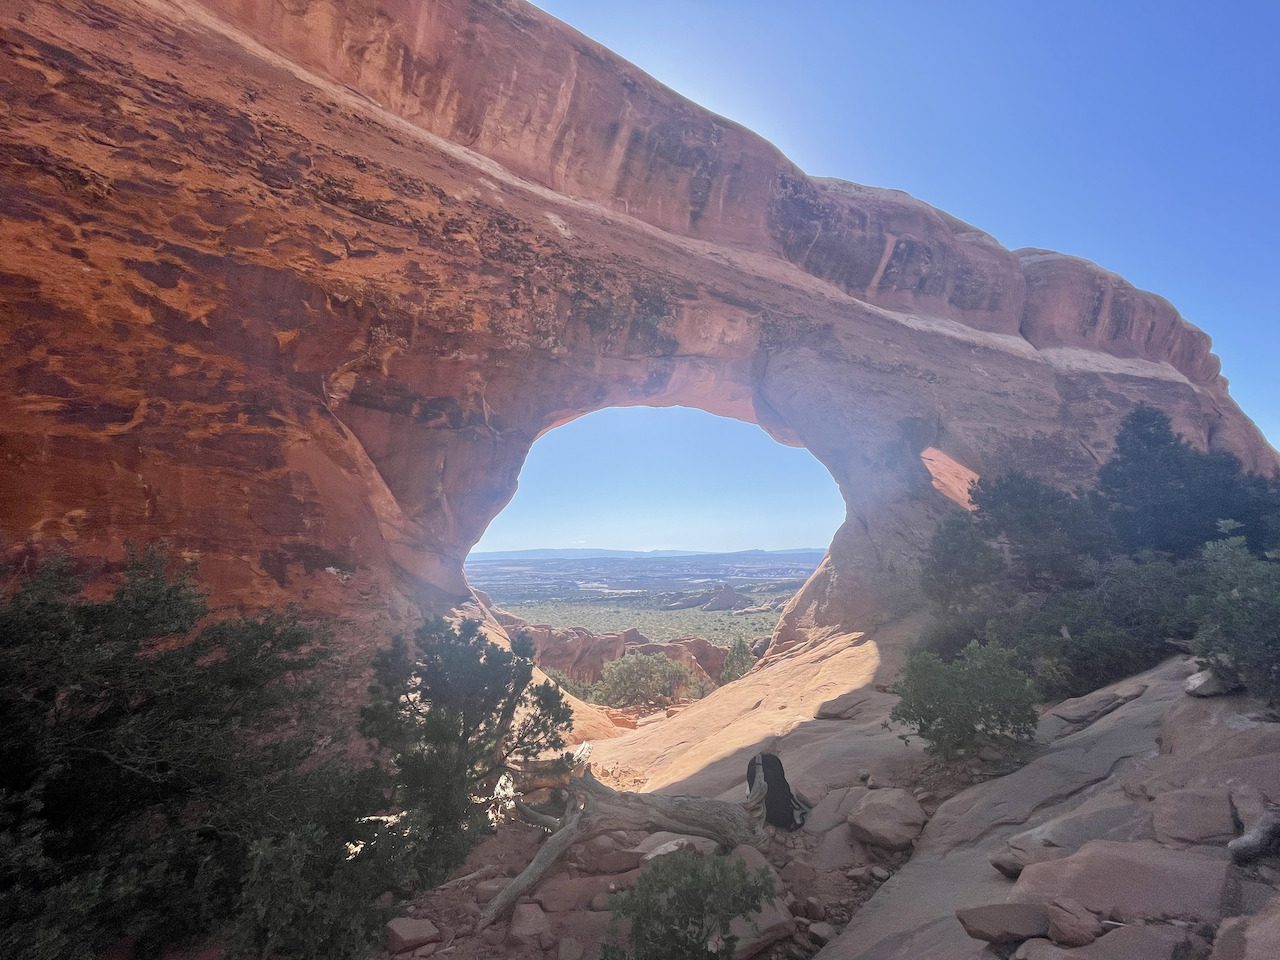
- The Delicate Arch
- The Delicate Arch Trail
- Delicate Arch Viewpoint
- The Fiery Furnace
- The Fiery Furnace Trail
- Fiery Furnace Viewpoint
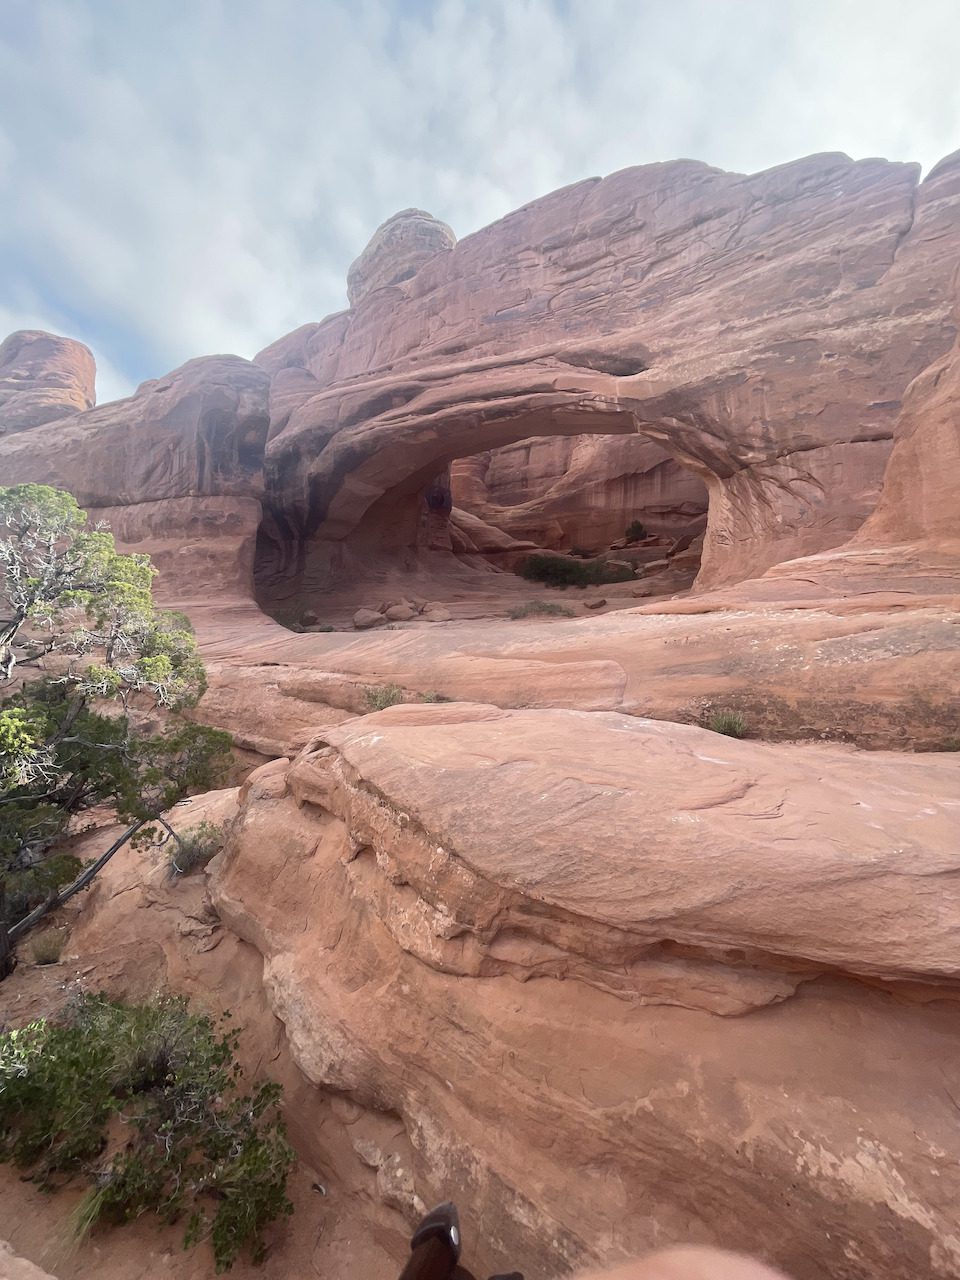
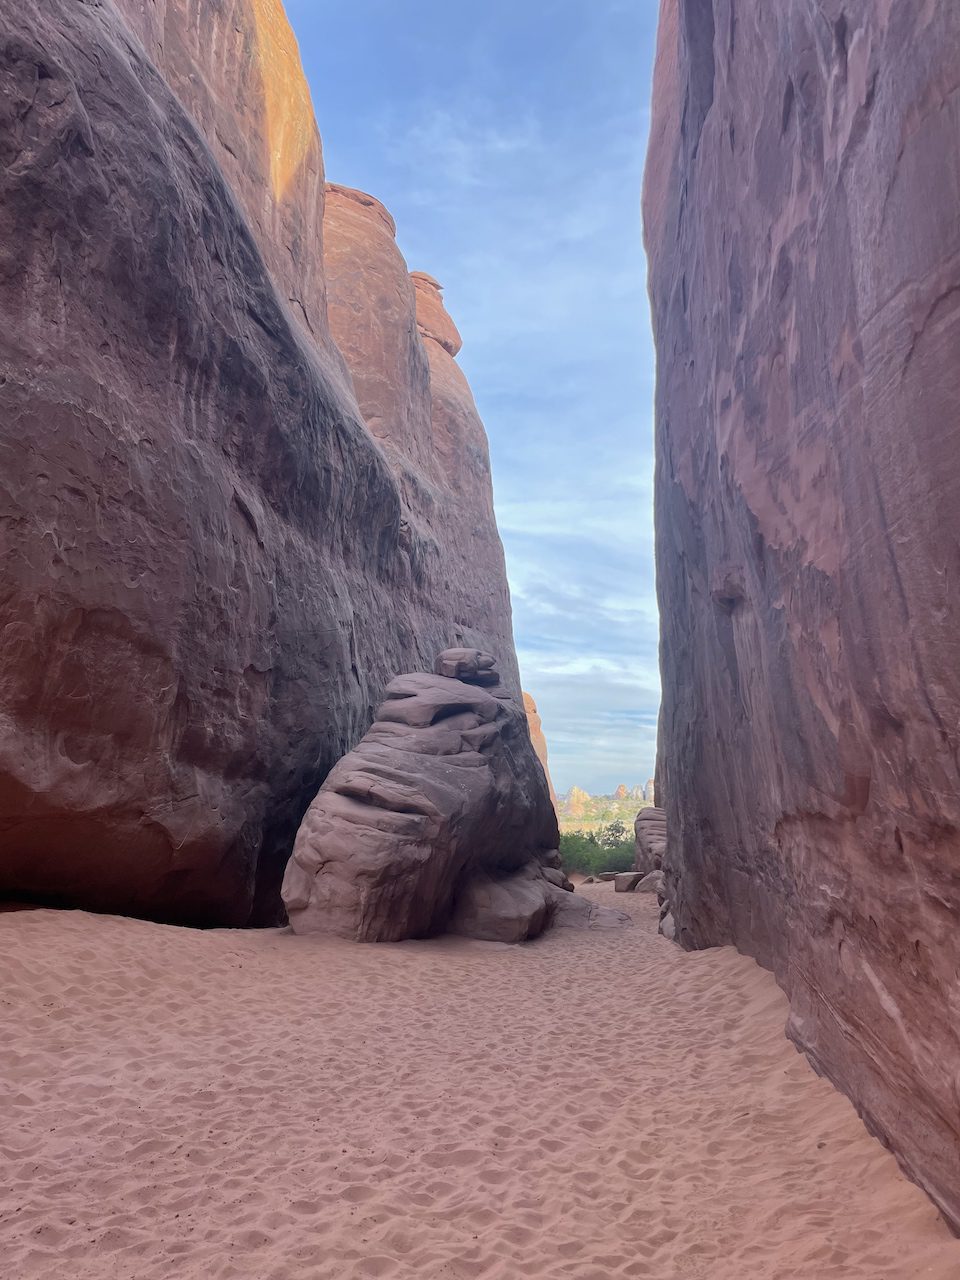
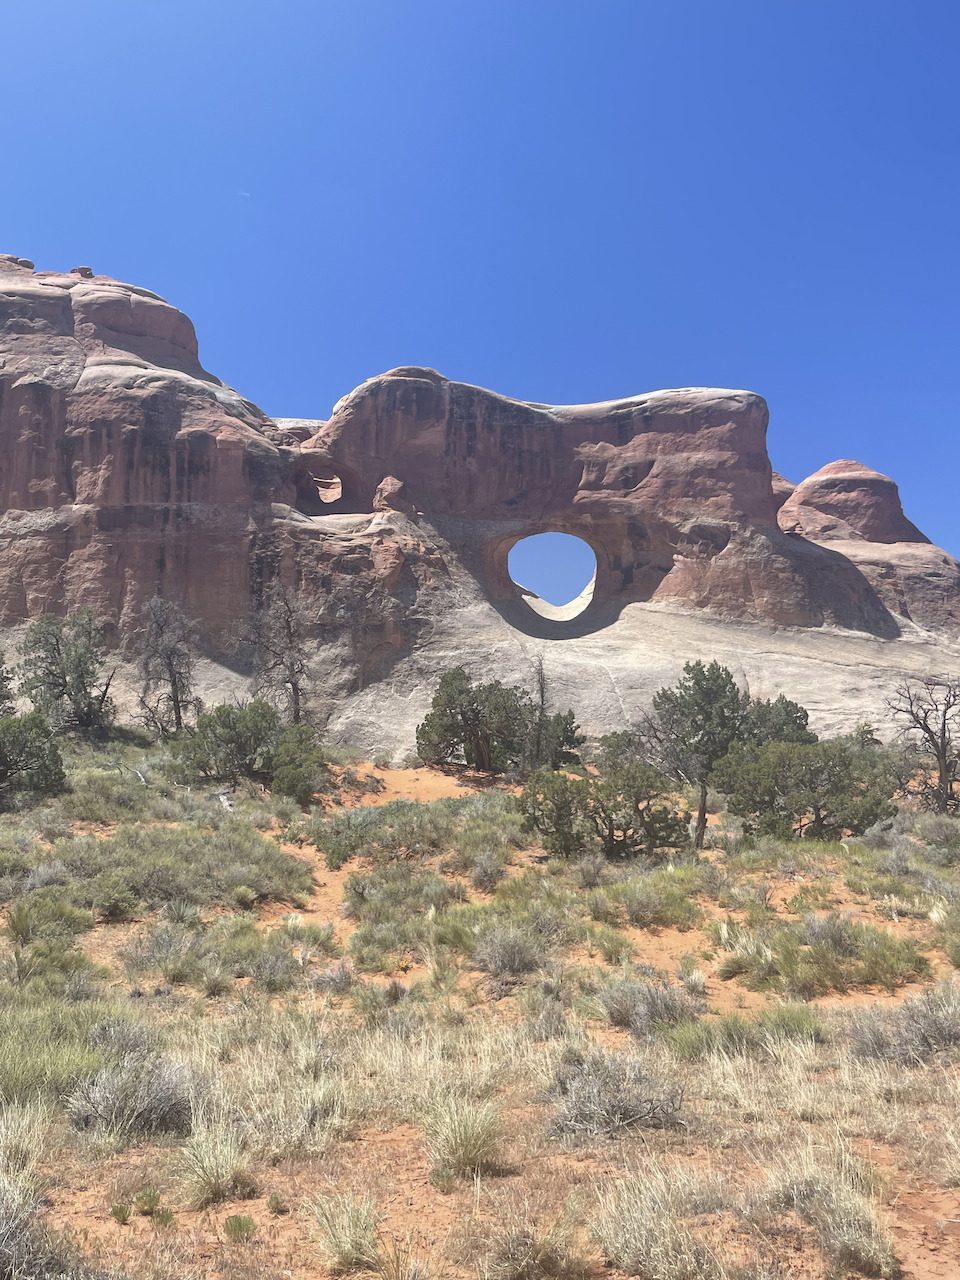
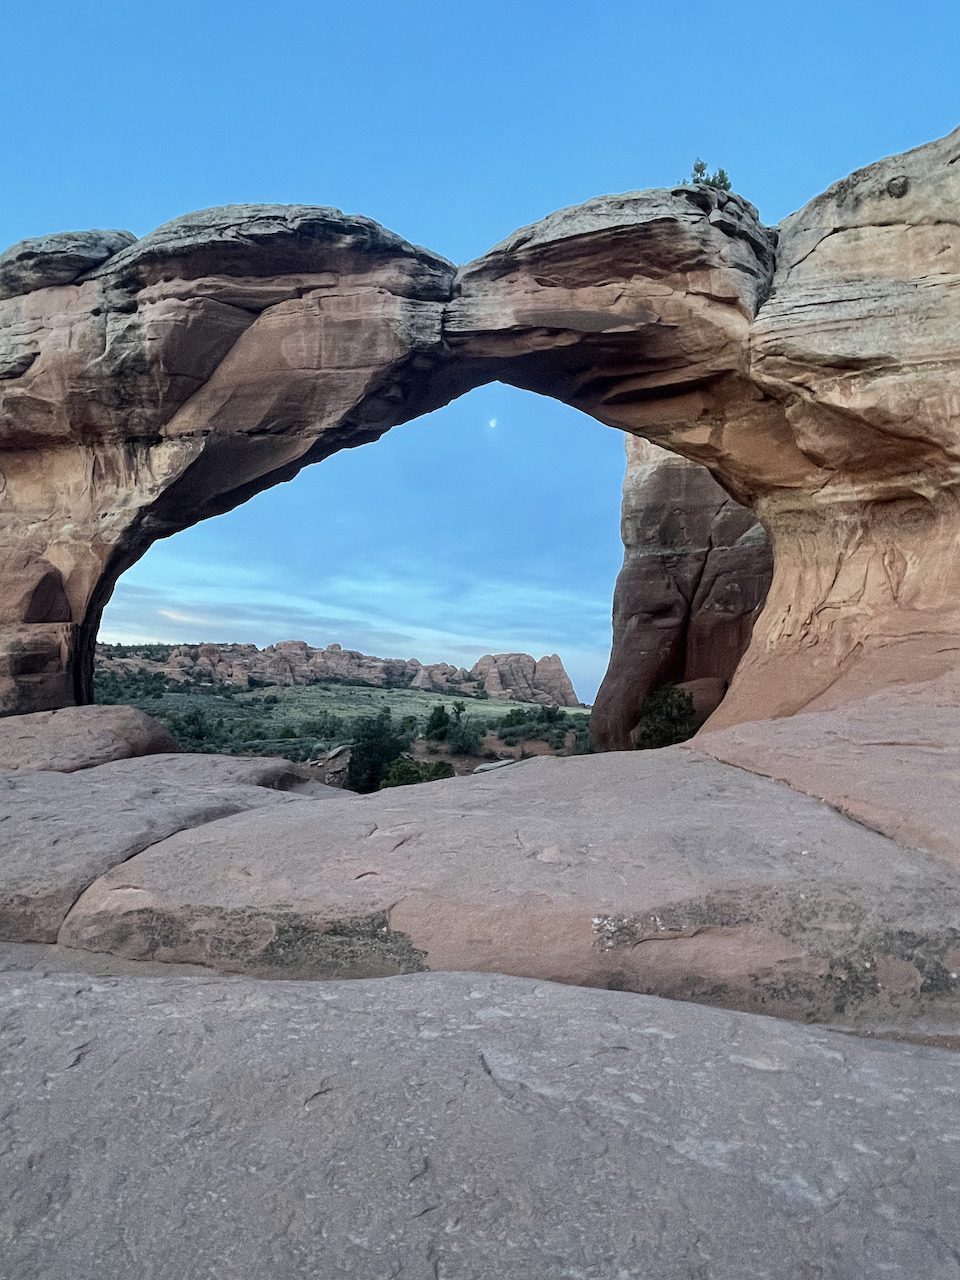
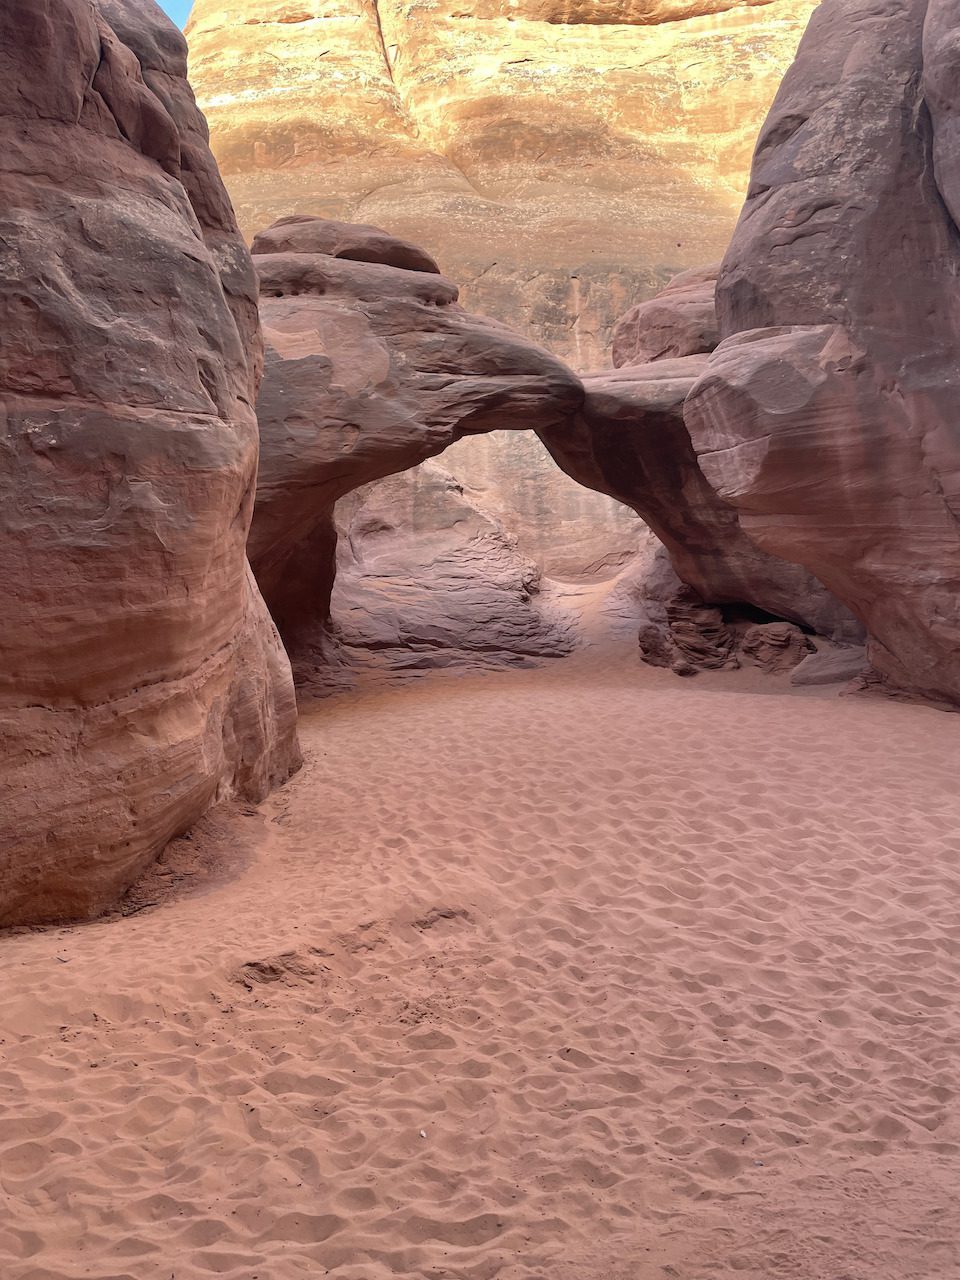
- Sand Dune Arch Trail
- Sand Dune Arch
- The Broken Arch
- Skyline Arch
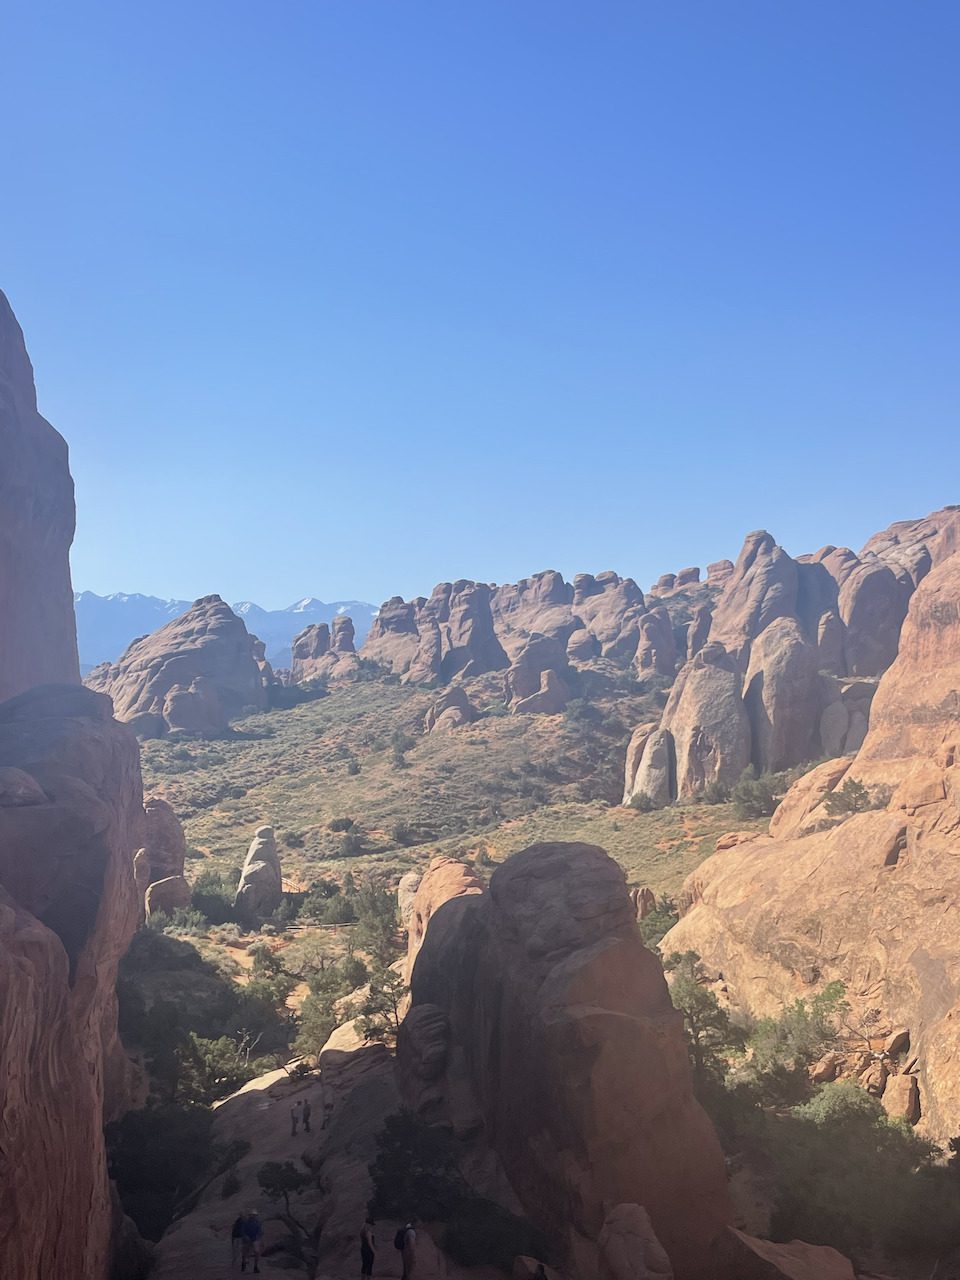
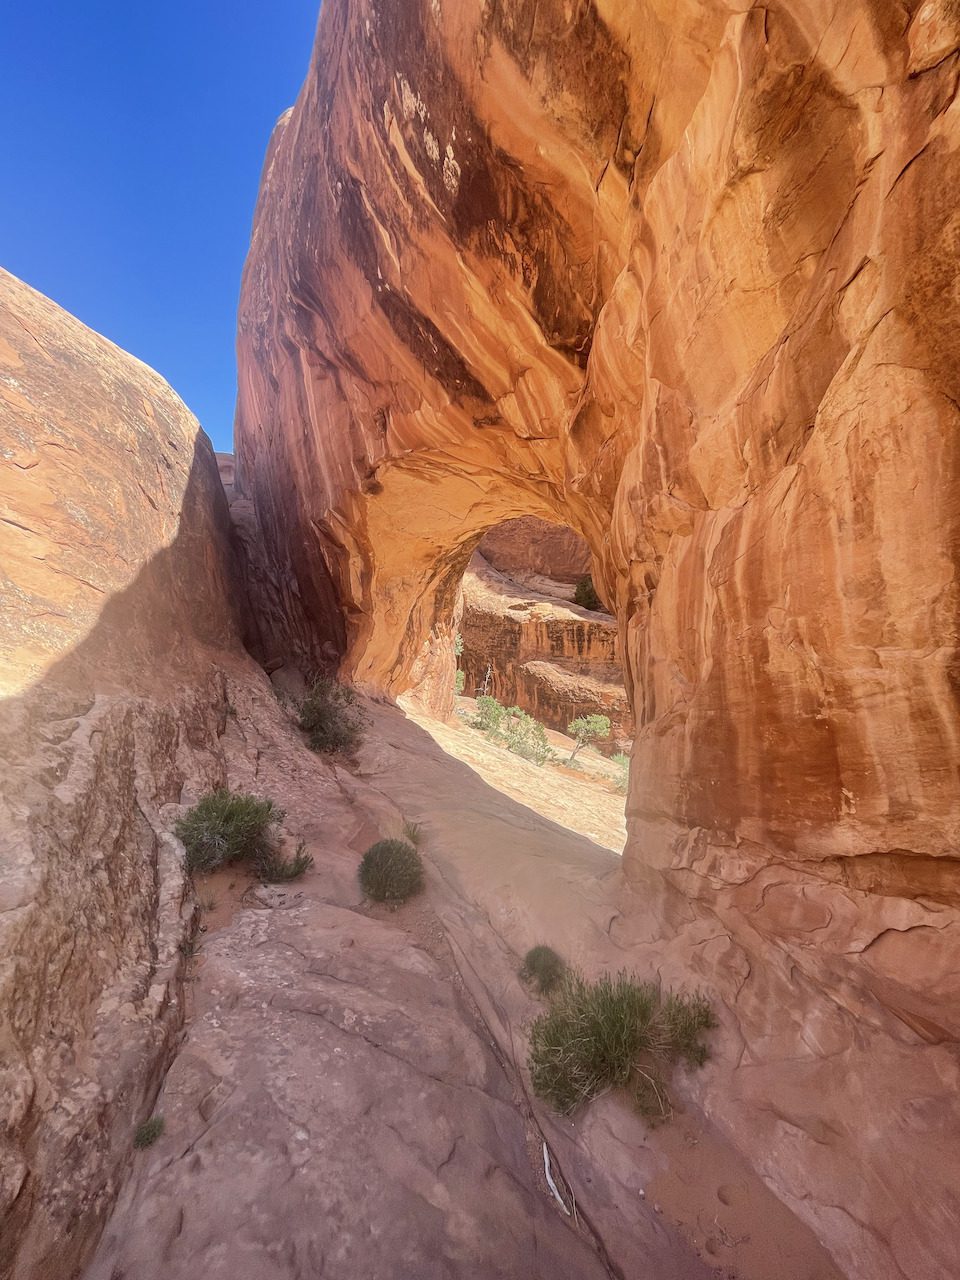
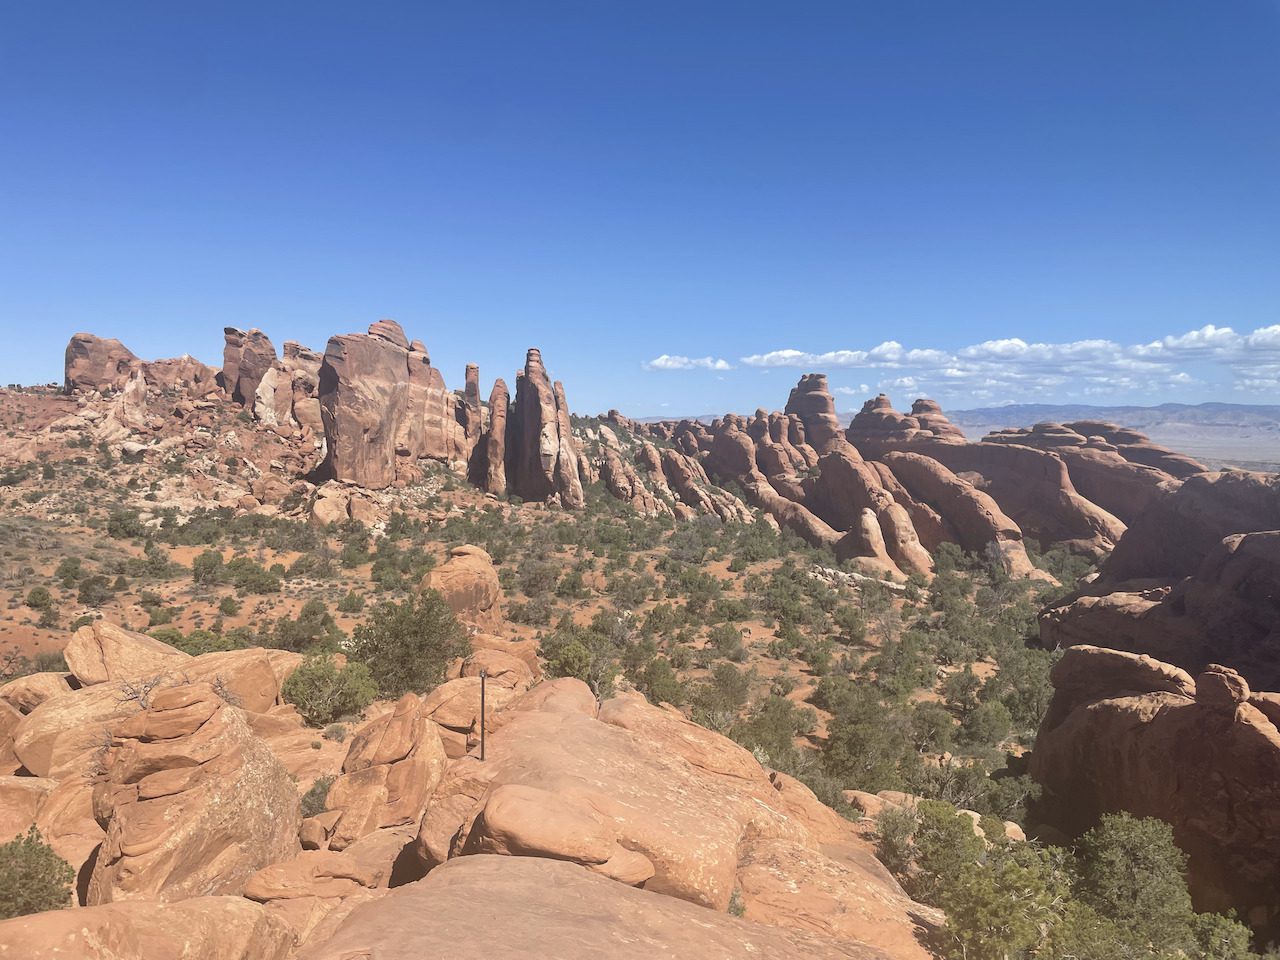
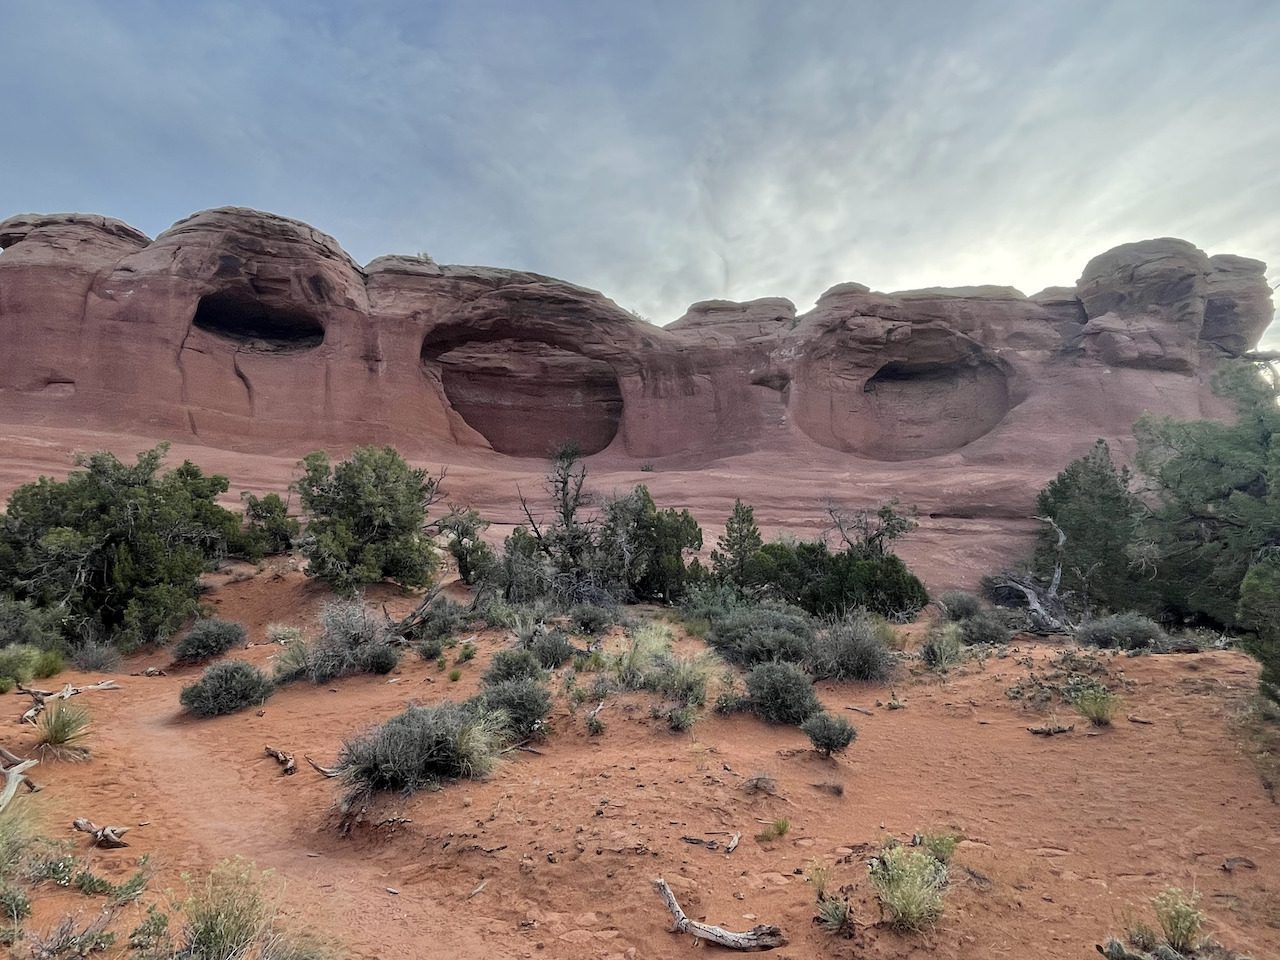
- Devils Garden
- Devils Garden Trail containing nine different archs.
- Klondike Bluffs
- Tower Arch Trail
5 Best Hikes In Arches National Park:
The moment you’ve all been waiting for my take on the 5 best hikes in Arches National Park:
#1 Devils Garden Trail
Distance: ~7.9 miles if hiking to all arches
Type: Loop
Permits Required: None
One of my favorite hikes in the park, The Devils Garden Trail, will give you views of NINE unique arches if you go to every trail offshoot! Don’t you dare skip one of these arches. Take as much time as you need to see these natural wonders!
#2 The Delicate Arch Trail
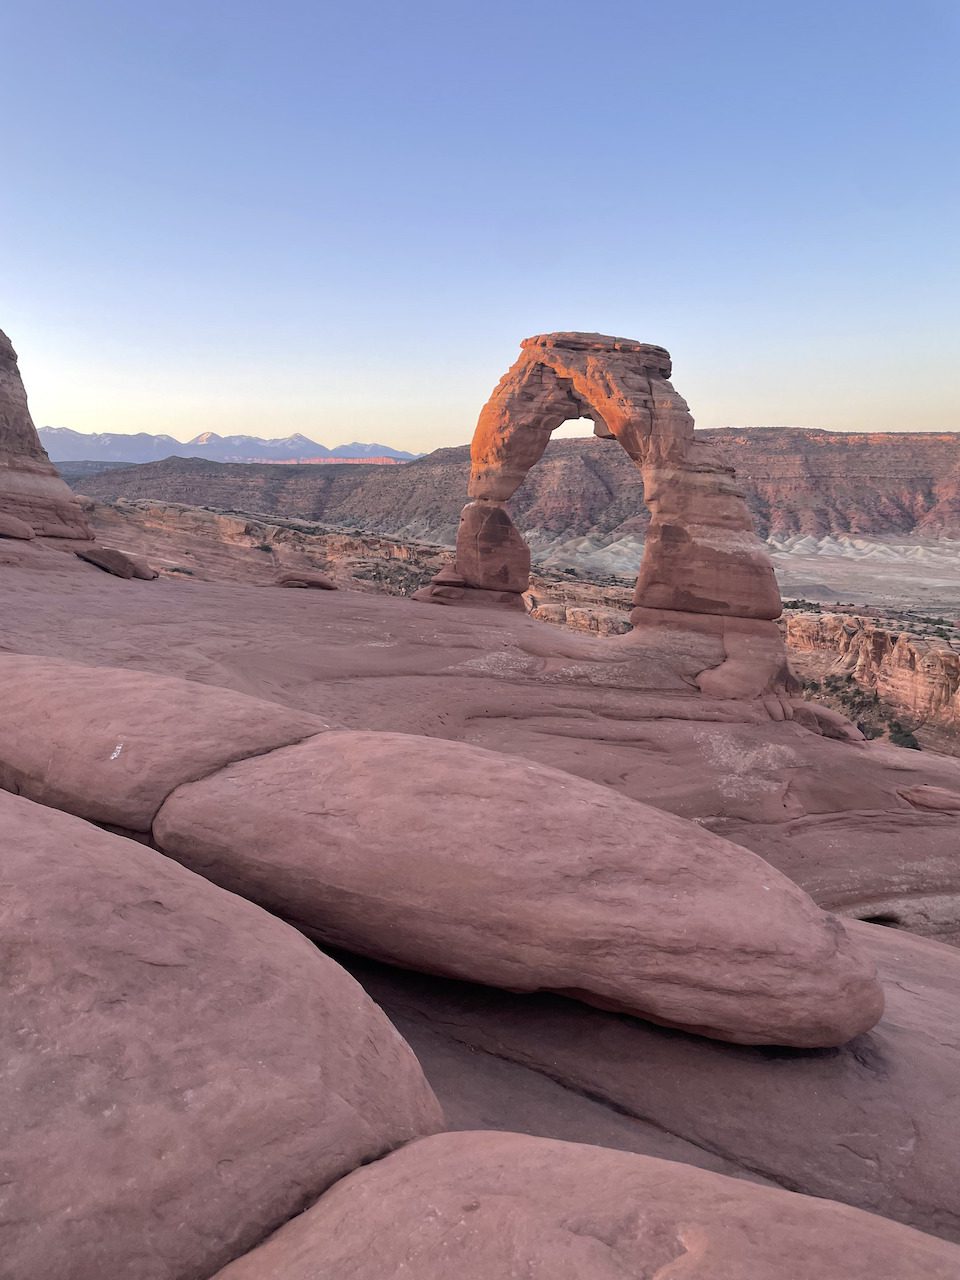
Distance: ~2.8 miles
Type: There and back
Permits Required: None
Do you know the Utah license plate? Well, that’s the Delicate arch!
I would recommend doing this hike either before sunrise or sundown, NOT in the middle. By going earlier or later, not only do you avoid HOARDS of people, but you also get away from the harsh Utah sun (there is very little sun coverage on this hike).
#3 Tower Arch Trail:
Distance: ~3.4 miles
Type: There and back
Permits Required: None
Located in one of the more remote areas of the park, Tower Arch Trail requires an eight-mile drive on the unpaved Salt Valley Road to reach the trailhead. Once there, you will get incredible views of the Klondike Bluffs and the Tower Arch at the end of the hike. This hike like most in the park is marked by rock cairns, it is especially important to pay close attention to the trail during this hike as it is easy to wander off route.
What I liked most about this hike was that there were barely any people on the trail! I think I saw four total during my trek.
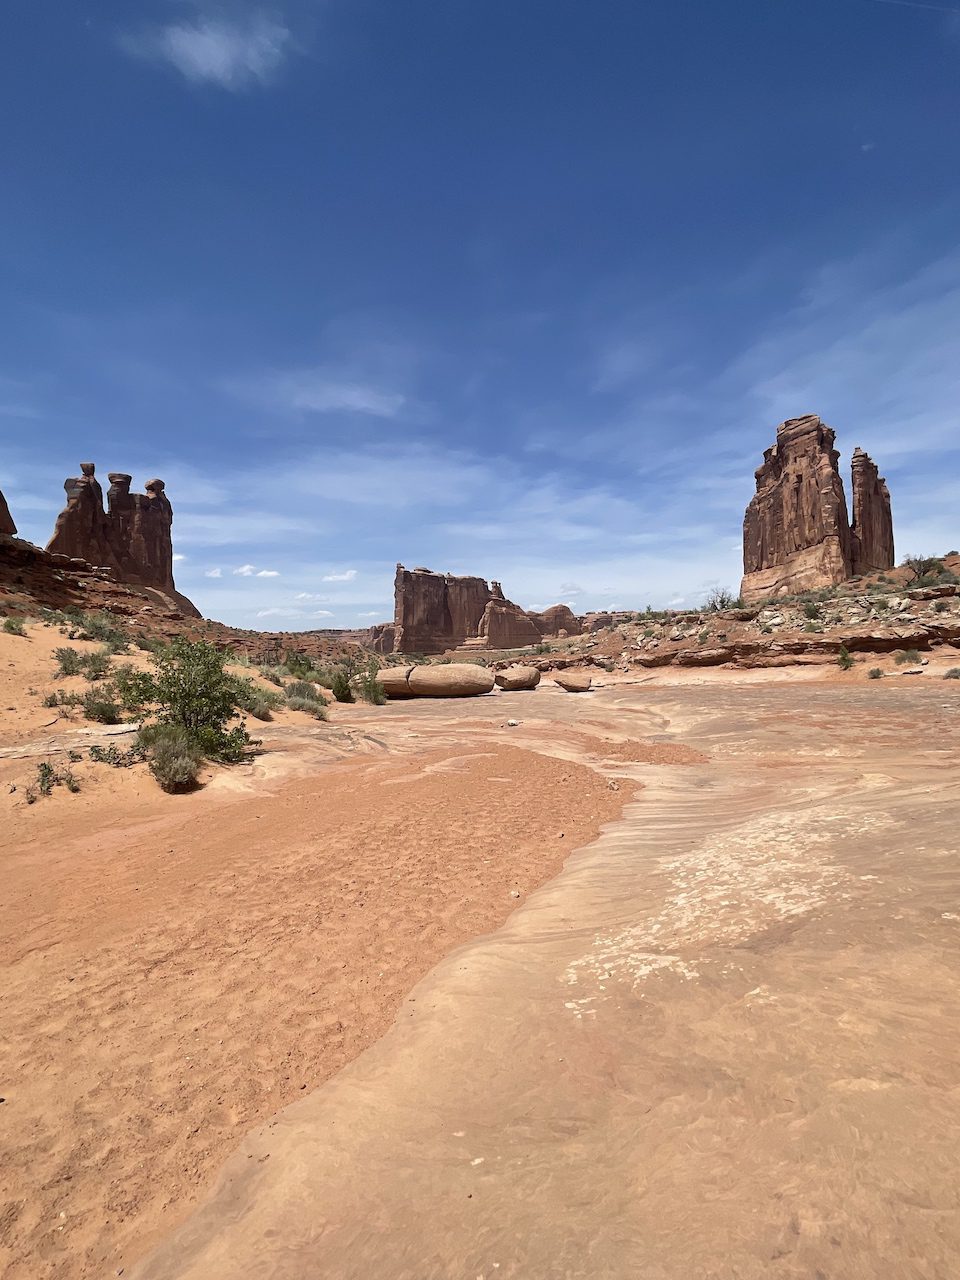
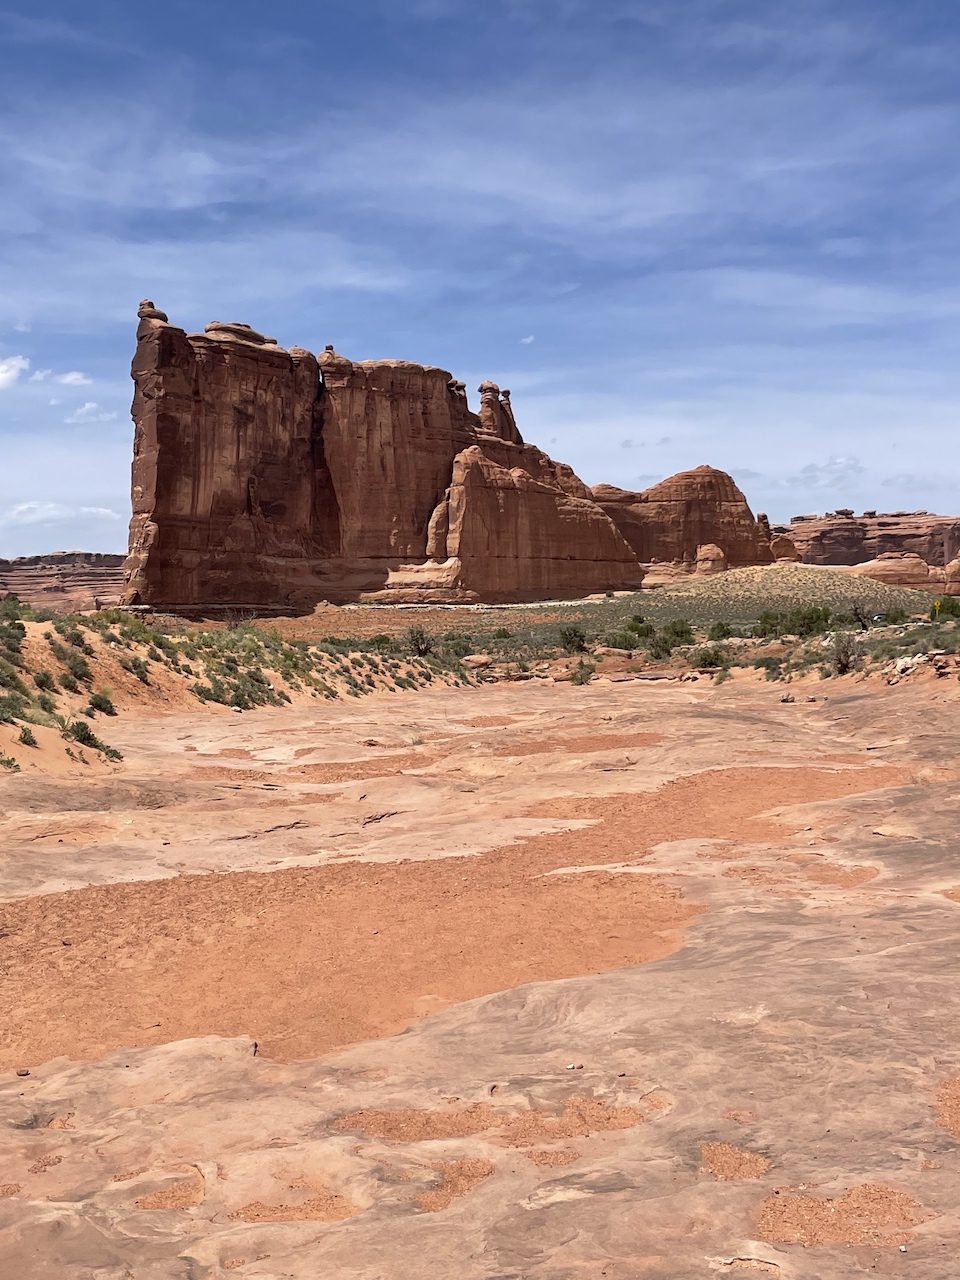
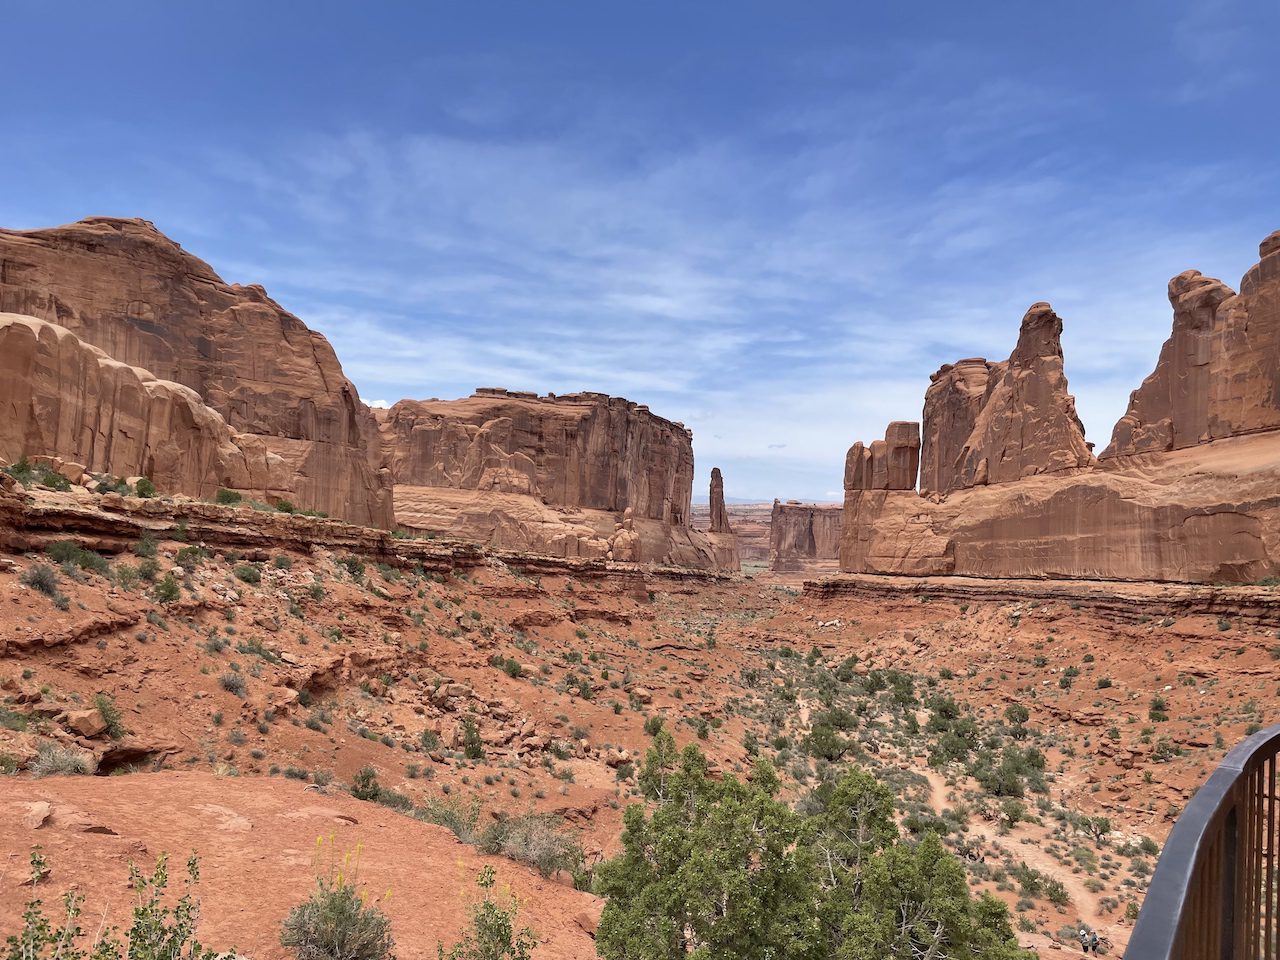
#4 Park Avenue Trail
Distance: ~2 miles
Type: There and back
Permits Required: None
At only 2 miles of roundtrip hiking, the Park Avenue trail may be short but is by no means lacking in amazing views. By just going to the viewpoint at the start of the course, you will get a spectacular vista of the massive red rock canyon which gave the hike its name given the similarity to a city block.
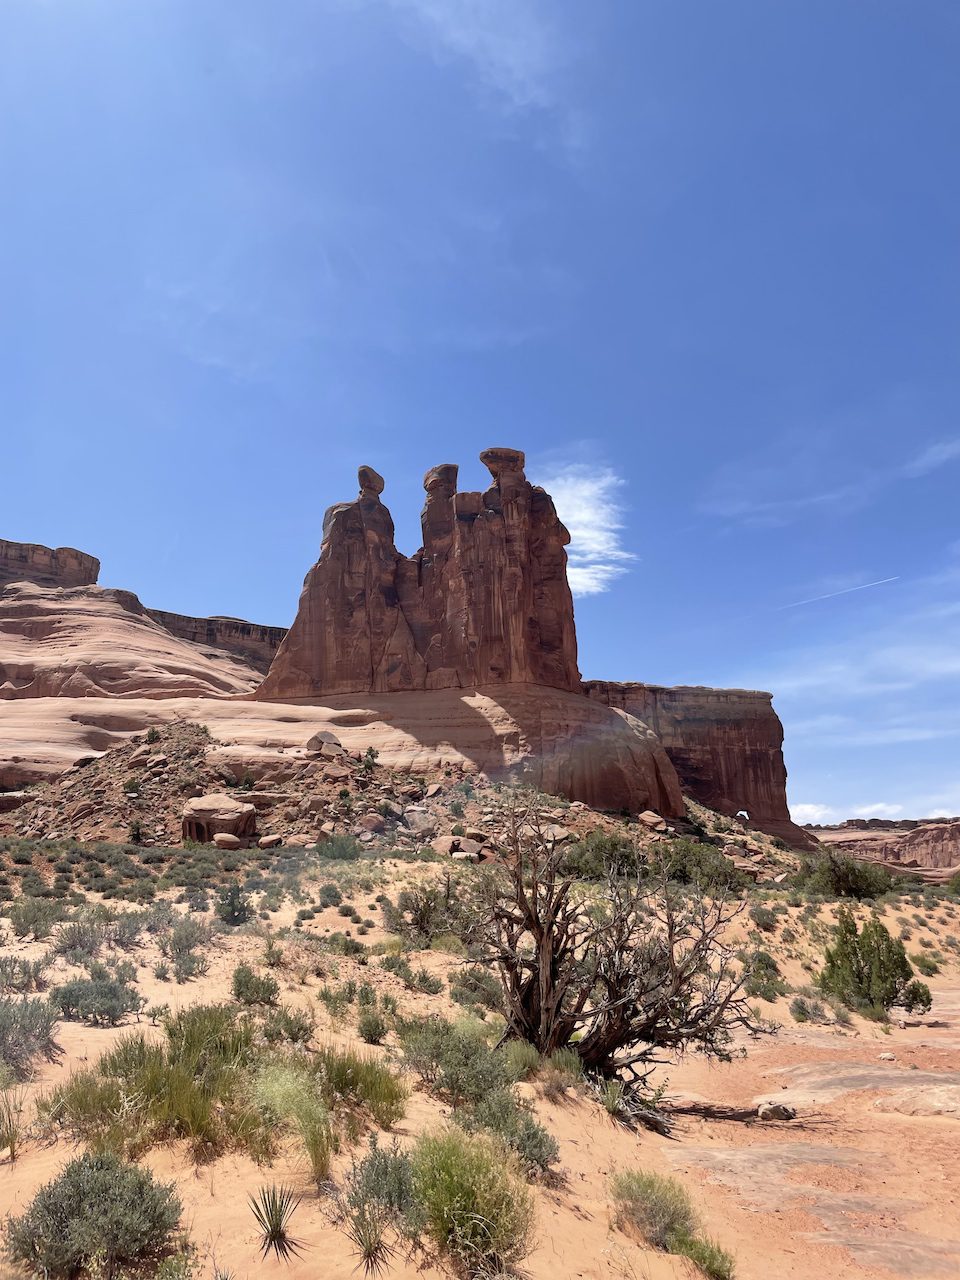
As you make your way through this trail, you will find yourself hiking on the canyon floor and will get spectacular views of the Three Gossips, Babel Tower, and The Organ!
#5. Sand Dune Arch Trail
Distance: ~2.2 miles
Type: Loop
Permits Required: None
The Sand Dune Arch Trail is easy and will give you great shots of the Sand Dune Arch, Broken Arch, and the Tapestry Arches. I did this hike at sunrise, which might be why it made it on this list because the red rocks look incredible when struck by the morning sun.
Arches National Park Travel Itineraries:
Don’t want to go through the hassel of planning out your travel itinerary for Arches National Park? No worries I got you. Check out some of my sample itineraries!
Arches National Park 1 Day Travel Itinerary:
Morning: Arrive in the park before Sunrise: Hike the Devil’s Garden Trail and make sure you see ALL OF THE ARCHES!
Afternoon: After hiking the Devil’s Garden Trail take your time to enjoy lunch and drive around to see the different viewpoints of the park.
Evening: After the park cools off and people start to leave, I would do a shorter hike like the park avenue trail and then catch sunset at The Delicate Arch. If doing both of these seems like too much definitely opt for catching sunset at The Delicate Arch.
Arches National Park 2 Day Travel Itinerary:
Day 1:
Morning: Arrive in the park before Sunrise: Hike the Devil’s Garden Trail and make sure you see ALL OF THE ARCHES!
Afternoon: After hiking the Devil’s Garden Trail take your time to enjoy lunch. Then if the heat isn’t too bad, head to the Sand Dune Arch Trail to see the Sand Dune, Broken, and Tapestry Arches. If you are feeling up to it, you can alsohead over to the Skyline Arch, which is in the area and is a quick walk with a nice view!
Evening: For sunset, I would head to the windows section of the park, where you can hike to the North and South Windows as well as the Double Arch.
Day 2:
Morning: Wake up early to knock out some easy hikes. We will do Park Avenue and the Balanced Rock Trails to star the day!
Afternoon: After a morning of hiking, enjoy lunch and drive around to see the different viewpoints of the park.
Evening: Hike to the Delicate Arch to catch the sunset.
What Gear To You Need For Hiking In Arches National Park?
While Arches National Park is stunning place to visit conditions can be harsh so it is important to have the right gear whenever hiking in the park.
#1. Water Storage

It can be scorching, and you will lose a ton of fluid when hiking in Arches National Park, so you should, at the bare minimum, bring three liters of water on every day hike you go on. I would recommend using a 2L water bladder and Nalgene water bottle for storage.
#2. Snacks

You want to make sure you are properly refueled whenever doing a long day of hiking. Check out 9 Best Salty Hiking Snacks to see some of my favorite snacks to bring on the trail.
#3. Sun Protection

Very important, there are several trails with little to no sun coverage, which means sun protection, including sunscreen, sunglasses, and a hat are a must!
#4. Proper Footwear

You need to wear proper footwear when hiking in the park. I went with Chacos hiking sandals which was great given all of the sand in Arches, but hiking boots would work well too!
#5. Park Map

![]()
Always have a park map. Every park, every time.
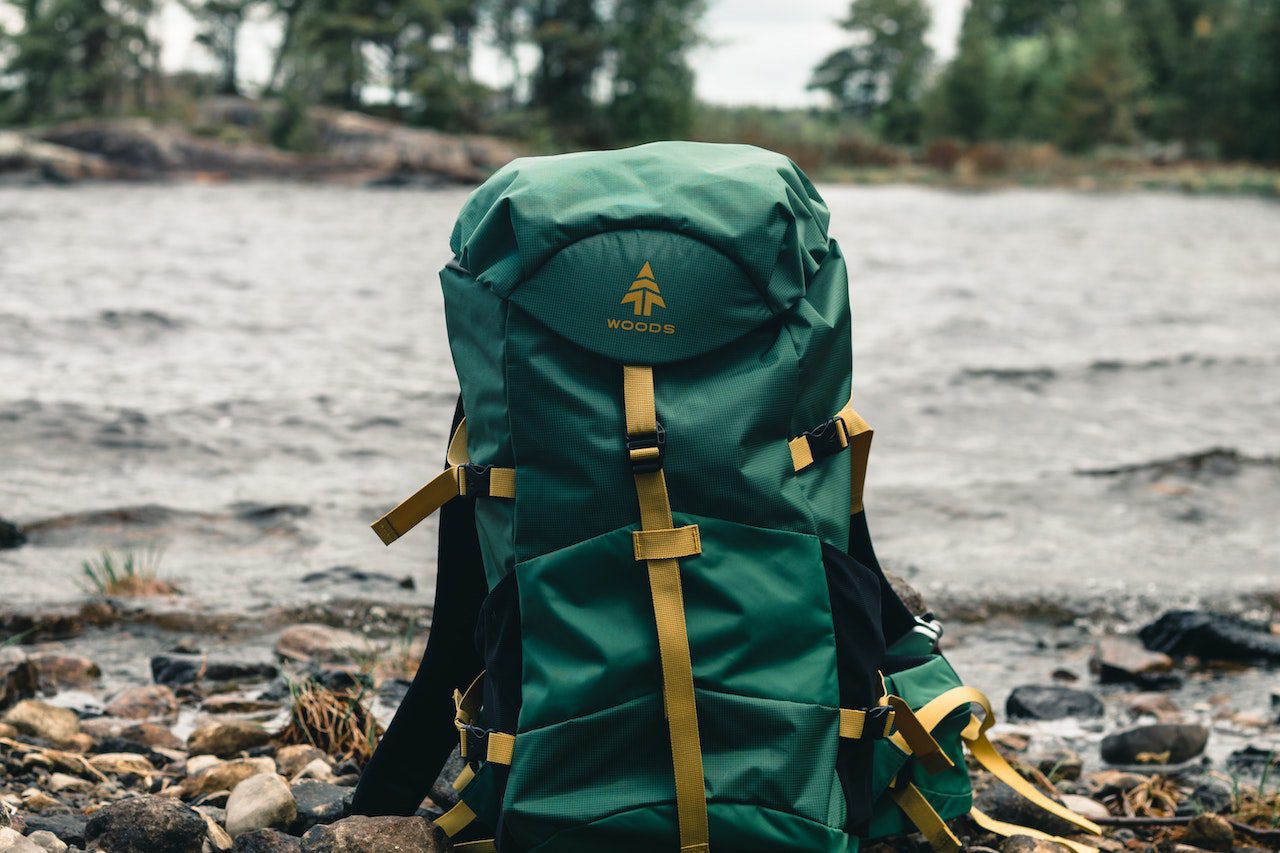
#6. Day Pack

![]()
You weren’t going to carry all of these items in your hands, were you?! If you don’t have one already, I recommend getting the Osprey Hikelite 18 backpack.
#7. Hiking Poles (optional)

These are optional, but if you have bad knees, I recommend picking up a pair of these.
Camping In And Around Arches National Park:
There are 52 campsites available in the Devils Garden Campground within the national park. These campsites require a reservation that can be made up to six months in advance. Just a heads up, if you do not have any campsite reservations when you arrive at the park, you will probably not be camping there!
Fortunately, there are a ton of campsites available, first-come, first, serve. You can view many of these campsites on recreation.gov or the overlander app.
Can You Go Backpacking In Arches National Park?
Yes.
You can go backpacking in Arches National Park. However, the park has few designated areas and no formal backcountry trails or campsites, so I elected to pass on this one! If you wanted to do it you would need to obtain permits from the park’s backcountry office.
What I Wish I Could Have Done
While I hit just about every trail you could during my time in Arches National Park, the only one I missed was the Fiery Furnace. According to a park ranger I spoke with, the Fiery Furnace Trail is a hike with lots of climbing and scrambling. The only thing is that it requires permits to hike, which were all booked by the time I visited the park, so no Fiery Furnace for me! At least now I have a reason to come back!
I Hope This Was Helpful!
I hope this was helpful for you guys! Feel free to ask any questions in the comments!